Your Guide to Flawless Coffee Frothing
Welcome to Flawless Frothing
Have you ever wondered how to achieve that perfect frothy crown on your coffee? It’s a simple pleasure many crave. Yet, not everyone knows how to do it right. In this guide, you will learn how to achieve perfect coffee frothing, even when your frother struggles with uneven foam.
We will explore the essentials. First, we’ll delve into the science behind frothing. Next, you’ll discover how to choose the right frother for your needs. You’ll learn how to prep your milk and master key frothing techniques. If things go wrong, we’ll help you troubleshoot. Finally, we’ll offer tips to enhance your overall coffee experience. Get ready to transform your frothing game!


Understanding Coffee Frothing
Frothing coffee isn’t just art; it’s science. At its core, frothing involves introducing air into milk. This process creates small bubbles that coalesce into a creamy foam. The key players here are proteins and fats. Milk contains proteins that stretch and stabilize the bubbles, resulting in rich, velvety foam.
Why Some Frothers Fail
Not all frothers are created equal. Some struggle to create that luscious texture, often due to inadequate aeration or temperature control. For example, a low-powered frother might not whip enough air into the milk, leaving you with a flat, unappealing foam. On the other hand, overheating milk kills its proteins, leading to a grainy texture.
The Right Temperature
Aim for a milk temperature between 150°F to 155°F (65°C to 68°C). Too hot? You’ll ruin the foam. Too cold? You miss out on those airy bubbles. Keeping this balance is crucial for achieving that café-style froth at home.
This understanding sets a foundation. Knowing how frothing works will enhance your skills. You’ll be more confident choosing equipment and preparing your milk. Next, let’s discuss how to select the right frother tailored to your needs.
Choosing the Right Frother
Not all frothers fit the same bill. Your choice can make or break your frothing experience. There are three main types to consider: manual, electric, and steam wands.
Manual Frothers
These are simple yet effective tools. They require some muscle but offer great control. You pump a handle to whisk the milk, creating foam. A good choice for those who enjoy a hands-on approach. Plus, they’re budget-friendly.
Electric Frothers
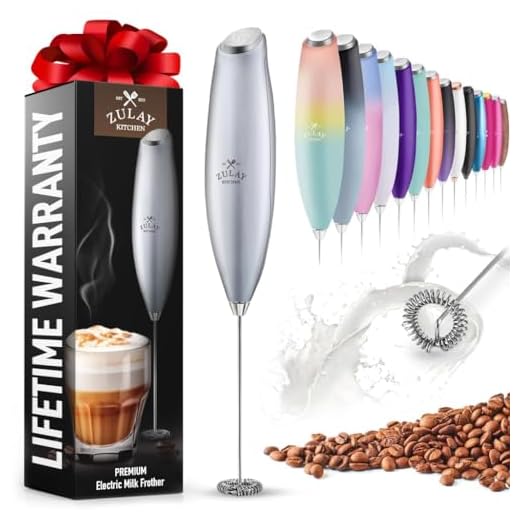
For the lazy coffee lover, electric frothers come as a blessing. Just press a button, and you get smooth foam without any effort. Options like the Powerful Electric Milk Frother make frothing a breeze. Ideal for those busy mornings.
Steam Wands
These come with espresso machines. They use steam to froth milk—a technique loved by baristas. If you’re serious about your coffee, a steam wand offers the best results. But it takes practice to master.
Factors to Consider
When choosing your frother, think about:
In the end, your frother choice should reflect your tastes and lifestyle. This sets you up for success in preparing your milk, which we’ll cover next.
Preparing Your Milk
Frothing is all about the milk. The type you choose directly impacts your foam quality. Not all milk behaves the same when introduced to air. Here’s how to prepare yours for that perfect, luscious froth.
Best Milk Types for Frothing
Not all milks create equal bubbles. For the best results, consider:
The Right Temperature
Temperature is key. Aim for 150°F to 155°F (65°C to 68°C). This range helps proteins do their job without overheating. If your milk gets too hot, that lovely foam turns grainy.
Preparing Your Milk
To prep your milk:
- Pour your milk into a container. Leave some space at the top. You need room for the bubbles.
- Heat it gently. Use the stovetop or a microwave. Remember to check the temp. A thermometer can be your best friend.
- Swirl it a bit before frothing. This helps emulsify the fats and proteins, creating a smoother texture.
These simple preparations can be a game changer. With your milk well-prepped, you’re one step closer to achieving that dreamy froth. Next, we will dive into techniques for perfect frothing to solidify all that hard work.
Techniques for Perfect Frothing
Mastering frothing is simple if you embrace a few key techniques. The right movements make all the difference.
Hand Movements Matter
Start by angling your frother. Hold it at a slight tilt — just enough to submerge the whisk part while keeping the milk surface visible. This way, you can introduce air without over-saturating.
Frothing Angles Count
Experiment with angles. A tilted frother produces better aeration. A horizontal angle allows for more significant movement. This change in position generates swirling currents that ensure even frothing.
Consistency is Key
Don’t rush the process. Take your time to froth. Aim for a steady motion, maintaining your hand’s rhythm. Clouds of foam should form before it thickens. The longer you froth, the better the integration of milk and air.
Practice
Practice is essential. You won’t become a pro overnight. Try various milk types and temperatures. Note what works best for you. Each attempt brings you closer to frothing perfection.
Engage with these techniques. They pave the way for flawless frothing and a delightful coffee experience. Next, we’ll tackle troubleshooting any foam issues you might encounter.
Troubleshooting Uneven Foam
Even with the best tools and techniques, uneven foam can happen. But don’t worry—this section will guide you through common issues and how to fix them so you can get back to frothing like a pro.
Identifying the Issues
1. Inconsistent Milk Temperature
If your milk has hot and cold spots, the foam will suffer. Aim for a steady temperature between 150°F and 155°F.
2. Wrong Frothing Technique
Not using the right motions can lead to bubbles of varying sizes. Remember to keep your frother at the right angle and depth.
3. Milk Type Matters
Using the wrong milk can result in poor foam. Whole milk creates the best microfoam. Non-dairy alternatives, if not a barista blend, may struggle to achieve the same frothiness.
Fixing the Problems
With these troubleshooting tactics, you’ll refine your frothing skills. Keep these tips in mind as you enhance your coffee experience, which we’ll explore in the following section.
Enhancing Your Coffee Experience
Frothing is just one part of your coffee journey. Once you master the art of creating delightful foam, the real fun begins. Consider how you can use that beautiful froth to elevate your drinks.
Creative Drinks to Try
Presentation Matters
Make your coffee feel special. Serve in clear glass cups to showcase layers. You can even create patterns in your froth—think hearts or rosettas. It adds a personal touch and impresses friends.

Mix and Match
Don’t be afraid to mix flavors. A chocolate syrup swirl can pair beautifully with your frothed milk. Try matcha for a green tea latte or chai spices for a cozy, spiced drink.
Enjoying the Experience
Remember, coffee is an experience. Take the time to savor your creations. Share them with friends or enjoy them in the quiet moments of your day. Good coffee deserves to be celebrated.
With creativity and exploration, you’ll elevate every sip. As you hone your frothing skills and adventurous spirit, let’s transition to the next phase: your frothing journey.
Your Frothing Journey
Now that you have the tools and techniques, it’s time to froth. Embrace the process. Enjoy the rich, creamy coffee. Each cup is a chance to create something special.
With practice, you’ll master the art of frothing. You’ll impress your friends and family. So, grab your frother and get started. Savor each moment. Your coffee adventure awaits.
 Previous Post
 Next Post
Frothing is a blessing and a curse 😂. I mean, who knew there was so much to it? But I’m still struggling with uneven foam. Might try the troubleshooting section next!
Haha, it can definitely be tricky! If you have a specific question, feel free to ask, Tommy!
I feel you! Uneven foam is the worst. I found that using colder milk helps a lot!
I really enjoyed the section about enhancing coffee experience. I never thought about pairing different milks with my coffee! Anyone tried almond milk?
I’ve used almond milk before! It froths well, but the flavor is a bit nutty. Not everyone’s cup of tea.
Almond milk can be tricky, but it’s worth trying! Just keep experimenting with different types until you find your favorite.
What’s the deal with the Clear Glass Espresso Cups? Do they really make a difference in how your coffee looks?
They do! It’s all about presentation, you know? Plus, you can see the layers in your drink.
Exactly, Lucas! They add a nice touch to your coffee experience and make it feel more special.
This article was cool and all but I still can’t get my foam right 😩. I’m using a manual frother and it’s a workout! Maybe I should splurge on that electric one?
I feel you, Jake! I had the same issue at first. Have you tried warming your milk first? It helps a ton!
Hey Jake, the manual frothers can be tricky. If you’re looking for something effortless, I highly recommend the electric one. It’s worth the investment!
Totally! I got the Powerful Electric Milk Frother, and it makes things so much easier. No more sore arms! 😂
Okay, so I’ve read this article twice, and I still can’t figure out the perfect frothing technique. I’m all about that latte art but it’s just not happening for me. 😂 Any tips?
Have you tried using a thermometer to get your milk to the right temp? It makes a big difference!
Mike, don’t stress too much about it! It takes practice. I suggest starting with simpler designs and working your way up. You got this!
I’m still using a whisk to froth my milk… It’s a workout! 😂 I might just give in and get an electric frother. Any recommendations?
Definitely check out the Powerful Electric Milk Frother! It’s a lifesaver and pretty affordable.
Haha, the whisk method is hardcore! The electric frother will definitely make your life easier!
Loved this guide! I finally bought the Zulay Premium Milk Frother, and wow, it’s a game changer. My lattes look like they’re from a coffee shop now. ☕️✨ Anyone else tried it? What do you think?
I’ve got the same frother! It makes everything so creamy. Crazy how something so simple can upgrade your coffee game! 🙌
Thanks for sharing, Sarah! The Zulay frother is super popular for a reason. Have you tried any specific frothing techniques yet?
I bought the Versatile Milk Frothing Pitcher after reading this, and it’s pretty good! But I feel like I need more practice with it. Anyone have tips for beginners?
I just got one too! Try to keep your frother at an angle while frothing. It helps create a whirlpool effect.
Great choice, Oliver! A lot of people love that pitcher. Start slow and watch your angles when pouring for better foam.
Great read! I’m thinking of getting the Paris Hilton Coffee Gift Set for my sister. Think she’d like it? She’s a coffee junkie!
I got that for my birthday! The packaging is so cute, and the coffee is delish. Your sister will love it!
That sounds like a fantastic gift! The set is stylish and perfect for coffee lovers. I’m sure she’ll appreciate it!