Make Your Thermos Earn Its Keep
Make every sip count
You want hot coffee that tastes right. You want it on the walk, at work, or in the car. A thermos can do that. But only if you pick the right one. This guide shows you how to choose. How to fill and use it. How to clean and keep heat and flavor. You will save time and money.
You will learn to care for YOUR flask. Fill smart. Stop leaks. Keep taste. Simple tricks will give you more uses. We cover cleaning, small fixes, and when to replace the bottle. Read on for clear rules you can use every day. They save heat. They save flavor. They save money. They save trips and time daily.


Keep Your Thermos Hot Longer: Simple Lunch Hacks
Why your thermos matters
Keep heat. Keep flavor.
Your thermos does more than hold liquid. It traps heat. It locks in aroma. A bad bottle leaks heat fast. Your coffee gets flat. Your tea goes stale. That costs you taste and time. It also makes you buy another cup.
Save time and money
When your drink stays hot, you skip the café line. You skip the waste. A solid thermos pays for itself in a few weeks. It spares you a cheap, bitter refill. It keeps your routine smooth. You stay on task.
What actually makes the difference
You want real insulation. You want a tight lid. You want durable metal that won’t taste like metal. Look for these features:
Avoid common failures
Leaks, slow heat loss, and lingering odors ruin the point. Leaks usually mean a bad seal or a warped cap. Fast heat loss means poor vacuum or thin walls. Odors build when you leave milk or strong brew inside. Rinse and dry. Do it the same day.
Quick model notes
Thermos Stainless King — classic, reliable heat.
Hydro Flask — light, colorful, fast chill.
Zojirushi stainless mugs — tightest heat hold for long commutes.
Stanley Classic — rugged, made for work sites.
You now know what a good thermos must do. Next: how to pick the one that fits your life.
Pick the right thermos for you
Material first
Start with material. Pick double-wall stainless steel. It holds heat. It keeps smells out. Vacuum insulation beats foam every time. Foam breaks down. Vacuum holds heat for hours. You want sure performance, not a trick.
Size that fits your day
Think of how much you drink. Match capacity to your routine. A 350–500 ml fits a commute. A 750–1000 ml suits a long day or shared coffee. Too big and you lug dead weight. Too small and you keep refilling.
Mouth and lid
Check the mouth. Wide mouths take scoops and ice. They clean fast. Narrow mouths pour neat and cut spills. Look at the lid. It must seal tight. Push, twist, and listen for a solid snap. A flimsy lid leaks at the worst moment.
Weight, balance, and parts
Pick it up. Carry it with a full load. Test balance in a bag. Heavy bottles tire you. Check the seals. Gaskets wear. Replaceable gaskets save money. Find models with spare parts or simple lids.
Match features to use
Decide how you’ll use it. For travel, pick rugged steel, thick walls, and a locking lid. For quick commutes, pick light weight and easy one-hand sipping. Skip flashy extras that add cost but not function.
Buy where it matters. Spend on core build, not on bells. Next you’ll learn how to fill and use your new thermos so every sip stays great.
Fill and use it smart
Preheat and fill
Preheat the thermos. Pour hot water in. Let it sit one minute. Dump the water. Add your coffee while it is hot. Fill it near full. Less air means slower cooling. Close the lid tight.
Quick fill checklist:
Lid and sipping
Open the lid as little as you can. Each opening dumps heat. If you can, drink through a sipping spout. Tip the bottle to pour into your mouth. Do not unscrew the whole top every time. For travel, use a cup lid or pour into a mug. The small pour keeps hot liquid from sloshing and saves heat.
Milk, taste, and timing
If you add milk, wait a short while after transfer. Milk cools faster than black coffee. A splash will drop the temp more than you expect. Coffee holds warmth well. The thermos keeps heat, not fresh flavor. Over hours, the taste flattens and acids change. Fresh brewed coffee moved quickly into the thermos tastes best.
Treat it as part of the brew
Brew in the pot. Don’t try to brew in the thermos long-term. Make the coffee hot. Transfer fast. Think of the thermos as the last link in the chain, not the brewer itself. Do this and you cut lost heat and dull flavor.
Next you’ll learn how to clean and care for the bottle so it keeps doing this job day after day.
Clean and care for it
Daily rinse
Rinse your thermos after each use. Do it while it is still warm. Warm water lifts oils and coffee residue. Turn the lid and gasket while you rinse. It takes seconds. It saves hours later.
Wash the lid by hand
Wash lids and gaskets by hand with mild soap. Use a soft brush. A toothbrush works. Scrub the threads and the spout. Do not use steel wool. It will scar the metal and ruin the seal.

Deep clean for stains and smells
For stubborn stains make a paste of baking soda and water. Rub it onto the stain. Rinse well. Or drop a denture tablet (like Efferdent) into warm water and soak the bottle for 30 minutes. Both work. They lift old oils and odors without rough scrubbing.
Handle seals and gaskets
Check seals and lids often for cracks or hard spots. If a gasket looks worn, replace it right away. Many makers sell spare gaskets. Stanley, Hydro Flask, and Thermos parts are easy to find. Match the part number or the inner diameter for a good fit.
Dry and store
Let all parts dry fully with the lid off. Air flow stops mildew. Store the thermos open. Keep it on a shelf or in a dry cup holder. Do not freeze your bottle. Do not soak it in boiling water. Extreme heat can warp seals.
What to avoid
Avoid bleach and harsh scrubbers. Avoid dishwashers unless the maker says it is safe. Harsh cleaners dull the finish. Harsh heat ruins the vacuum.
Treat your thermos with small acts. They add years to its life and keep your drink true. Next, learn simple tricks to get more use from it.
Simple tricks to get more use
Use it for more than coffee
Think beyond morning brew. Carry tea, bone broth, cold brew, smoothies, or a simple lunch soup. A warm broth keeps you sharp on a long shift. A cold tea keeps you fresh on a hot walk. Small swaps double the bottle’s value.
Pack it and label it
Put a thermos in your bag. Skip the store line. Bring your own and save time and money. If you share a fridge or desk, label it. A strip of washi tape or a small name tag works well. I once saved a lunch by writing my initials on the lid.
Carry a spare gasket
Gaskets tear. Carry a spare in a small zip bag or a pill case. Store the gasket with a tiny note of the model or inner diameter. Many gaskets fit by size, not brand. Replace fast and keep going.
Tie it to a habit
Make refills part of your routine. Refill after breakfast. Rinse after lunch. A ritual keeps the bottle useful and clean. It makes the thermos feel like part of your day.

Keep drinks colder or stronger
Pre-chill the bottle with ice water for five minutes before you pour in a cold drink. It stays colder longer. For hot drinks, brew a touch stronger. Add 10–20% more coffee or tea. It will taste right after an hour or two.
Use a wide mouth for food and snacks
Wide-mouth models hold soup, stew, yogurt, or nuts. They are easy to eat from and to clean. Compare a wide-mouth Hydro Flask 20 oz to a narrow travel mug—one holds stew, the other does not. Choose the shape that fits your day.
Small shifts like these add hours of service to one thermos. Next, learn how to spot real trouble and when to replace parts or the whole bottle.
Troubleshoot and know when to replace
Quick leak test
Fill your thermos with water at the sink. Tighten the lid. Turn it upside down. Watch for drops. Do this on a towel. A small drip now costs you a wet bag later.
Check the gasket and lid
Open the lid. Pull the rubber ring free if you can. Look for cracks, flat spots, or hardening. Clean the groove. Re-seat the ring firmly. If the seal still fails, replace the ring or the lid assembly.

Test the insulation
Pour near‑boiling water in. Seal it tight. Wait one hour. Feel the outside. The bottle should stay hot to the touch. If it cools fast, the vacuum may have failed. A failed vacuum robs you of hours of heat or cold.
Damage to watch for
Small fixes vs. replace
Replace gaskets, lids, and feet when you can. Tighten loose screws. Clean with baking soda or white vinegar for smells. These fixes buy weeks or years of use. But a crushed inner wall, heavy rust, or a stubborn odor means the bottle is done. Don’t tape or glue a broken vacuum. It won’t hold heat.
Recycle the old one
Don’t toss a metal thermos in the trash if you don’t have to. Separate plastic lids from stainless steel bodies. Check local scrap metal or recycling rules. Some brands take back old parts.
Run these checks when you buy, after a drop, or when a sip surprises you. If it passes, keep using it. If it fails, replace and recycle before you move on to the next step.
Put it to work
Pick a thermos that fits your habit. Use it right. Clean it well. Try the tricks that suit you. Fix small faults quickly. Replace when it fails. Do these things and your thermos will earn its keep, one hot cup at a time. Keep it simple. Make it routine. Save money. Cut waste. Enjoy warmth.
Start today. Fill it with a drink you love. Carry it. Sip slowly. If a seal wears, swap it. If rust appears, retire it. A little care goes far. Your thermos will repay you. Teach someone else the habit. Today too.
 Previous Post
 Next Post
Planning a weekend hike and the Stanley Adventure-To-Go 25 oz caught my eye after reading the ‘Put it to work’ section.
I like the idea of one container that handles both hot coffee and ditching disposable cups.
Also thinking of bringing the Thermos Stainless King 24 oz Food Jar for lunch chili — anyone used these two together on a long trail?
Multiday notes welcome. I’m carrying a pack with decent capacity but want to minimize rattling and weight.
Thanks!
If rain’s expected, make sure lids are tightly sealed and wrap the food jar in a dry sack. I’ve had steam leak into my pack before — not ideal for electronics 😂
Great combo. The Stanley 25 oz is durable and cup-shaped enough to double as a sharing cup, while the 24 oz food jar is excellent for hot meals. Pack them snugly (use clothing to buffer) to avoid rattling and keep heavier items close to your back. Also preheat the food jar with hot water for a few minutes before filling to keep food hotter longer.
Also check the gaskets before leaving — tightened/replaceable seals are a small but important prep step mentioned in the ‘Troubleshoot and know when to replace’ section.
One more thing: for long hikes, it’s worth testing everything at home first (shake tests, leak tests) so you don’t get surprises on trail. Lightweight bowl or spork fits nicely on top of the food jar too.
Yup — took both on a 2-day trip last month. The food jar kept stew piping hot for 8+ hours. Tip: freeze a slim ice pack and put it next to the Stanley bottle if you want to keep drinks cold for an extra day.
I love the Thermos Stainless King 40 oz for weekend trips, but real talk — that thing is heavy AF when full. The guide’s ‘pick the right thermos’ section helped me reconsider what I actually need for daily use vs. travel.
Would you guys recommend downsizing for daily commute and keeping the 40 oz for hikes only?
If you need soup sometimes, grab the Thermos Stainless King 24 oz Food Jar — smaller, but perfect for lunches and keeps things steamy all day.
Yep, I swapped to a 25 oz Stanley for work and the 40 oz Thermos sits in the car for road trips. Less back pain, same coffee stamina.
Also consider what fits your bag — capacity is one thing, shape/width matters too. The Thermos 40 oz can be too chunky for some backpacks.
Exactly — that’s the idea. Keep the 40 oz for full-day outings or shared use. For daily commute, a Contigo Byron 16 oz or the Stanley Adventure-To-Go 25 oz is much more practical. Think about how long you want hot/cold and what you can comfortably carry.
Minor rant: bought a Contigo Byron 16 oz and it started leaking from the spout after 3 months. 😒
The article’s troubleshooting helped (cleaned the gasket, reseated everything) but still a little drip.
Is that a sign to replace the whole thing or can I fix it cheaply?
I had the same issue, ordered a replacement silicone seal from Contigo’s site for like $5. Fixed the leak. Worth checking warranty too — some brands honor leaks within a year.
Also remember to check the article’s ‘know when to replace’ checklist: persistent odors, permanent stains, compromised insulation, or unfixable leaks are all signs it’s time to retire the bottle.
If cleaning and reseating the gasket didn’t help, check for cracks in the lid or a misshapen gasket — those are common fail points. Many lids/gaskets are replaceable (check Contigo replacement parts). If the main body is fine and replacement parts are cheap, swap the gasket. If the lid is cracked, replacement might be more cost-effective than a whole new mug.
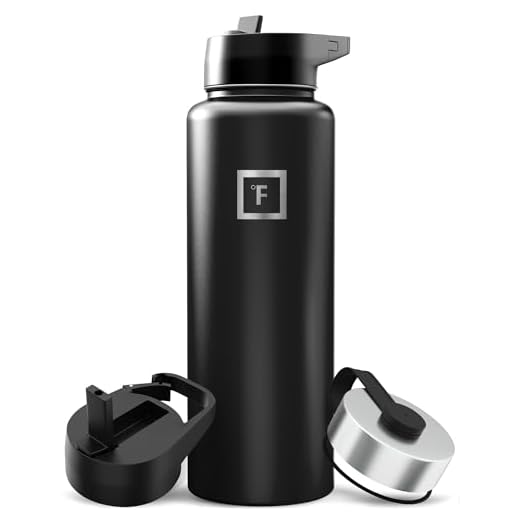
Wow — this article actually made me rethink my Iron Flask 40 oz.
I always just chug water between sets, but the “fill and use it smart” section (temperature layering? never knew that phrase) is legit useful.
Also the Holikme brush recommendation saved me — got that set and it reaches the bottom no prob.
Quick q: anyone tried freezing half a bottle inside the Iron Flask overnight so it stays cold all day? Does that mess with the vacuum insulation if it’s sealed?
Appreciate any tips. 🙂
If you’re nervous, try the Thermos Stainless King 40 oz instead — thicker feel and the lid seems more robust for temperature experiments. But same rule: don’t freeze sealed bottles.
I’ve done a half-freeze trick a couple times — left the lid slightly loose while freezing, then tightened in the morning. No damage yet but def be careful. Pro tip: wrap a thin towel around it for the first hour so melting ice doesn’t drip everywhere 😅
Good question — short answer: don’t freeze a fully sealed vacuum bottle. If you freeze only part of the liquid and leave some air space (and don’t seal it tight while freezing) it’s usually fine. The bigger risk is expansion putting pressure on the lid or gasket. Also, long freezes can cause condensation cycles that over a very long time may stress seals.
I appreciated the cleaning section — finally gave my thermos a proper deep clean with the Holikme brush set and vinegar. Night and day difference.
Simple trick I liked: use warm water + baking soda overnight for stubborn coffee stains.
Anyone else have stain-removal secrets?
I swear by those denture tablets. Cheap, small to carry, and they actually work better than some specialty cleaners I’ve tried.
Baking soda + warm water is a classic. Another trick: use effervescent denture tablets in warm water — they lift stains and odors nicely. Always rinse thoroughly after.
Make your thermos earn its keep? More like make ME earn my thermos… I keep forgetting it at work and then mourn its absence like a lost pet.
But seriously, love the ‘simple tricks to get more use’ ideas — putting the thermos by the door is something I will actually do (promise?).
Also: if you ever want to feel like a wizard, pour boiling water into a Thermos Stainless King 24 oz Food Jar, wait a minute, dump it, then add your soup. It stays insane-hot for hours. Magic.
If anyone needs tips on thermos placement strategy (i.e., not leave it at the café), I can lecture you for 10 mins. 😂
Love the humor and the preheating tip — that really helps with meal jars. For not forgetting: keep a designated spot (near keys or your bag), or set a phone reminder. Small rituals work wonders.
Haha same — I tape a tiny sticky note to my laptop charger: ‘Thermos?’ It works 60% of the time. Also, prepack the thermos the night before and put it next to your shoes. Pavlovian engineering.
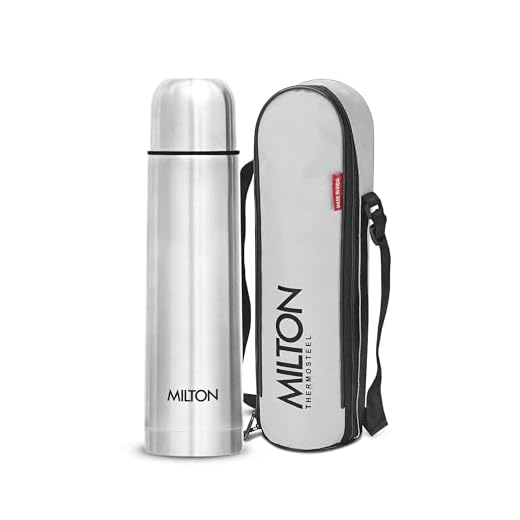
Quick shoutout: Milton Thermosteel 500 ml flip lid is my go-to for quick errands. The flip lid is actually useful (no fumbling) but it can get gunky — Holikme brushes ftw.
Anyone have tips for keeping flip lids clean without disassembling every time?
Flip lids are great but they trap residue. I recommend a daily rinse and a weekly deeper clean: use the Holikme multi-size brush set to reach small crevices, soak the lid components in warm soapy water, and occasionally run a vinegar/baking soda soak if there’s odor.
I just use a tiny brush from the Holikme set and a toothpick for stubborn gunk. No need to go full disassembly unless it’s been weeks. Also let the lid air dry completely before reassembling to avoid mildew.