Step-by-Step: Tune Grind, Ratio, Temp to Save Your Coffee
Why Tune Grind, Ratio, Temp?
You want coffee that tastes like coffee. Not thin. Not burnt. Not sharp.
Three small things control that: grind, ratio, temperature.
Tweak each and you fix weak, bitter, or sour.
This guide gives exact numbers. Simple tests. Photo and video prompts.
Follow step-by-step fixes. Taste better coffee fast.
You will learn when to grind coarser or finer, how to set dose, and what water temp to use every brew fast.


Mastering Coffee: Clear Ratios for Perfect Brew
Spot the Problem: How to Tell Weak, Bitter, or Sour
The sip test
Brew a small cup. Let it cool 15–30 seconds. Take one deliberate sip. Hold it. Feel where the taste lands.
Weak coffee feels thin. It slides across your tongue. It lacks weight. It fades fast.
Bitter coffee attacks the back of the tongue. It bites. It hangs. It can make you purse your lips.
Sour coffee lights the front. It makes your mouth pucker. It brightens and lifts. It can feel sharp or fruity.
Think of an espresso shot. A thin shot tastes weak. A long, oily shot often tastes bitter. A short under-extracted shot can squeak sour.
One-minute checklist
Use this quick list. Mark low, medium, or high for each item. Do it fast.
Score each: Low / Med / High. Write it down. One word notes help: “watery,” “harsh,” “juicy.”
Photo clues that matter
Take three photos before you change anything. One of the dry grounds on your scale. One of the brew bed right after pouring (or after brewing). One of the final cup from above and side.
A too-fine grind looks like flour. A too-coarse grind shows big crumbs. A channel in the brew bed hints at uneven flow. Crema that’s thin and pale points to weak or under-extracted espresso.
Use a simple setup to repeat tests. A Baratza Encore or a Hario V60 helps you see changes fast. Keep the notes and photos. They guide the fixes you’ll try next.
Fix Weak Coffee: Grind Coarser, Strengthen the Ratio, Mind Brew Time
Start with exact numbers
You need more extraction. Use a 1:15 brew ratio (grams coffee : grams water). Weigh everything. Small changes show up fast. Try this first. Taste. Note what changes.
Grind and dose
For pour-over, go one notch finer than your baseline. For full-immersion (French press, aero), go coarser. If the cup still feels thin, raise the dose by 1–2 grams per 100 ml of water. Bigger dose gives more body without pushing bitterness.
Temp and timing
Push water temp to 94°C (201°F) for most beans. Hotter water pulls more oils and sugars. Then shorten your pour schedule or reduce dwell time. Less wet time prevents soggy grounds and uneven flow.
Quick step-by-step to try now
Real-world note
I once brewed at work with a cheap blade grinder. The cup was thin. I tightened the grind, added 2 g per 200 ml, and raised temp. The next cup had weight and rounded flavors. Film each tweak. Take a 10–20 second clip of the bed and a sip. Compare clips. Change one thing at a time.
Fix Bitter Coffee: Coarser Grind, Cooler Water, and Faster Flow
Why bitterness shows up
Bitter coffee comes from over-extraction. You pulled the wrong stuff out of the bean. The dark, harsh bits come last. Stop them first. Act fast. Make one change at a time.
Grind and dose
Coarsen the grind by one to two notches. Bigger particles slow extraction. They stop the bitter compounds from over-running the cup. If you use a stepped grinder, move two clicks coarser. If you use a manual, turn a visible notch or two.
Compare grinders by consistency. A Baratza Encore gives steady steps. A cheap blade does not. A stable grinder makes your changes repeatable.
Temp, ratio, and flow
Drop the brew temp to 90–92°C (194–198°F). Cooler water pulls fewer bitter oils. Try a weaker ratio next: 1:16 (coffee:water) if bitterness keeps biting. Speed up your pours. Drain the brew a bit faster so less time sits on the grounds. For immersion methods, shorten brew time by 15–30 seconds.
Quick how-to:
Read the bed and spent grounds
Take a photo of the spent grounds and the brew bed. Look for dark clumps or a shiny film. Those are signs of over-extraction. A pale, even bed is better. Use your phone. Compare shots before and after tweaks. You will learn fast.
Fix Sour Coffee: Finer Grind, Hotter Water, and Longer Contact
Nudge the grind finer
Sour means under-extracted. You did not pull enough sugars and oils. Turn your grinder one notch finer. If you use a stepped grinder, move one click. If you use a stepless, rotate a small amount. You will see faster flow and fuller taste. Try a finer grind on a Fellow Ode or Niche Zero for even particle sizes.
Raise the temp for bright beans
Some washed or high-acid beans like more heat. Set your brew water to 96°C (205°F). The hotter water extracts acids into balance without burning the bean. Use a kettle with stable presets so you can repeat the temp every time.

Strengthen the ratio
If the cup feels thin after you tweak grind and temp, up your dose. Move to 1:14 (coffee:water). That gives more solubles in the cup. It is a simple switch. Small change. Big impact.
Slow the pour and add contact
For pour-over, slow your pour. Let water sit longer on the bed. Aim for a calm, steady drawdown. For immersion brews, add 10–20 seconds to your total time. That extra contact pulls sugars and body.
Quick checklist
Read the bed with photos
Photograph the bloom and drawdown. Look for dry spots or a fast channel. A patchy bloom shows poor wetting. A fast drawdown shows too-coarse grind still. Use the photos to tune one variable at a time.
Quick Recipes and a Troubleshooting Flow You Can Follow
Pour-over (Hario V60 or Kalita)
Use a medium-fine grind. Think coarse sugar. Dose 18 g coffee : 288 g water (1:16). Water 94°C (201°F). Bloom 40 g for 30 s. Pour in slow concentric circles. Total brew 2:30–3:00. Aim for a calm drawdown.
AeroPress (inverted)
Use a fine-medium grind. Dose 18 g : 220 g water (1:12). Water 92–94°C. Bloom 10 s, stir 10 s, steep 60 s, flip and plunge 20–30 s. Fast and clean. Works with light roasts.
French press (30 oz / 850 ml)
Use a coarse grind. Think breadcrumbs. Dose 30 g : 450 g water (1:15). Water 93°C. Stir, cover, steep 4:00. Press slow for 20–30 s. Rest 30 s, then pour to avoid over-extraction.
Rapid troubleshooting flow
Taste → Diagnose (weak / bitter / sour) → Tweak one variable: grind or ratio or temp → Brew again → Compare.
What to photograph or clip
Use these to spot channels, dry spots, fast drawdowns, and uneven wetting.
Quick log checklist
Run the recipe. Log the result. Then move on to the final wrap-up.
Tune, Taste, Repeat
You can fix most problems with small moves. Change one variable at a time. Take a photo. Taste again. Log your wins. Over time you learn your coffee. Your notes sink less into guesswork.
Make one change. Write it down. Wait. Brew. Taste. Keep the best. Repeat. You will build a clear map. Soon you know how each tweak shapes the cup. You brew with calm and skill and pride.
 Previous Post
 Next Post
Not gonna lie, I’m lazy and the One-Touch Coffee and Spice Grinder sometimes sneaks into my routine even though I KNOW the burr is better. 😂
That said, the article’s section on ‘Fix Bitter Coffee’ saved me — I lowered temp and opened the grind a notch. Still, I want a better budget grinder. Has anyone tried both the Electric Coffee and Spice Grinder with Stainless Blades and the Electric Burr Grinder with 28 Precise Settings and can compare?
Also check used listings for burrs — you can get a solid model second-hand for much less.
That scale is great for travel and tiny dosing. Good combo planning.
I’ve owned both. Burr is more expensive but pays off if you care about espresso or single-origin beans. Blade is fine for quick morning coffee.
If budget’s tight, use the blade for coarser brews and the burr when you want to experiment. No shame in hybrid setups!
Short answer: burr wins for consistency and extraction control. Blade grinders (like the Electric Coffee and Spice Grinder) are cheaper and fine for drip/French press if you’re economical, but for espresso or precise recipes the burr is worth it.
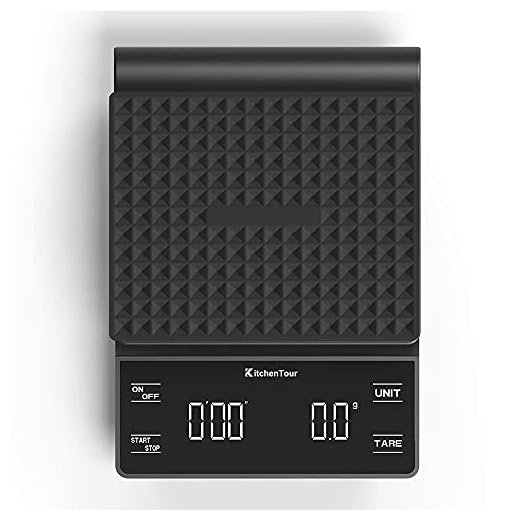
Thanks everyone — saving up for the burr now. Might pair it with that Rechargeable Mini Espresso Scale with Timer and USB-C for portability.
This article is dangerously effective. My partner thought I’d stop tweaking—nope. Spent half the morning switching between the Electric Coffee and Spice Grinder with Stainless Blades and the One-Touch Coffee and Spice Grinder just to compare. Also, the COSORI Gooseneck Electric Kettle presets are oddly satisfying to watch. lol
I have a weird issue: my espresso tastes kinda both sour and bitter depending on the day. I use the Electric Burr Grinder with 28 Precise Settings and COSORI kettle. Could it be inconsistent dosing? I only have a cheap kitchen scale right now.
Inconsistent dosing or uneven extraction can cause that flip-flop. Try the Rechargeable Mini Espresso Scale with Timer and USB-C or the High-Precision Coffee Scale with Timer and LCD to tighten dose and flow. Also check grind retention in the burr — old grounds can mess with consistency.
If you want, post your current dose, grind setting, water temp, and shot time and we can help troubleshoot further.
Also check tamp pressure and puck prep. Even with a great grinder, channeling can cause mixed flavors.
Good points—I’ll try the mini scale and a more consistent tamp. Thanks!
Fun read. I wish there were more coffee photos showing fine vs coarse grounds, but the recipes are solid. Also, is the Rechargeable Mini Espresso Scale with Timer and USB-C reliable for >1g accuracy? I’m picky.
Thanks — I might splash on the high-precision one then.
Good suggestion about photos — we’ll consider adding visuals. The mini scale typically gives reliable readings to 0.1–0.5g in short bursts, but if you need extreme precision for microdosing, the High-Precision Coffee Scale with Timer and LCD is the better pick.
I have the mini and it’s been fine for single shots. For dosing espresso competition-style, get the higher-spec scale.
Loved the troubleshooting flow — actually helped me diagnose my bitter espresso. I ended up using my Electric Burr Grinder with 28 Precise Settings to go slightly coarser, and the COSORI Gooseneck Electric Kettle with Presets to drop the temp a bit. Huge improvement. Quick Q: should I trust the presets on the kettle or measure temp with a probe every time?
Glad it helped, Olivia! Presets are fine for day-to-day, but if you’re chasing consistency or trying a new bean, measuring with a thermometer (or confirming once) is a good idea. Small roasts react differently to temp.
If you have the High-Precision Coffee Scale with Timer and LCD, use it to control brew time and dose — that made a big difference when I tweaked temp and grind together.
I second this — presets are convenient but I keep a cheap probe for new beans. Also, congrats on taming the bitterness 😄
Short and sweet: the One-Touch Coffee and Spice Grinder is a life-saver when I’m in a rush. Not as precise as my burr, but for quick French press batches it’s perfect. Anyone else use it for pre-ground blends?
I tried the flow chart and finally fixed my weak pour-over. I realized I was over-dosing water. Switched to the High-Precision Coffee Scale with Timer and LCD and followed the ratio suggestions. Night and day.
Nice! Scales remove a lot of guesswork. Which ratio did you land on?
I settled on 1:16 for my medium roast — closer to 1:15 was too strong for my taste.
Quick shoutout: the troubleshooting flow is perfect when you’re sleep-deprived. Found myself following the ‘Fix Sour Coffee’ steps and adjusting only grind and temp — worked fast. One typo spotted in the article near the recipes section but nothing major.
Thanks for the heads up on the typo — I’ll patch that. Glad the flow chart saved your morning!
Okay, long post incoming because this article answered a ton but also made me realize how many variables I was ignoring. I used to blame beans, then I read ‘Spot the Problem’ and did a proper taste test:
– My first cup was sour: switched to a finer setting and let it bloom a bit longer.
– Still sour? I cranked up the COSORI kettle temp by one preset and tightened the ratio.
– Now it’s balanced, but I noticed a tiny metallic note — turned out my Electric Coffee and Spice Grinder with Stainless Blades was due for cleaning.
I also started using the Rechargeable Mini Espresso Scale with Timer and USB-C for single-serve shots — tiny device, huge help. Pro-tip: log your settings for each bag of beans so you don’t repeat mistakes. 😅
Note: rice cleaning is common but can leave starch residue over time. For long-term blade care, occasional disassembly/brush + air blow is better if the model allows it.
Thanks for the checklist — metallic notes are the worst. What cleaning routine do you use for the blade grinder?
Also consider switching to a burr grinder if you can — the Electric Burr Grinder with 28 Precise Settings made my cups way more predictable.
I run a small amount of uncooked rice through the blade grinder, then wipe with a dry cloth, followed by a quick brush. Only occasional deep cleans with a damp cloth on the housing. Works okay, not perfect.
Love this methodical approach, Sofia. Cleaning grinders is underrated — residue changes flavour a lot. Logging settings per bean is exactly the ‘Tune, Taste, Repeat’ mindset we wanted to encourage.
Constructive note: the ‘Tune, Taste, Repeat’ section is motivational but could use a quick printable checklist (grind, ratio, temp, time) for beginners. I ended up scribbling my own and it helped. Also, small rant: why do blade grinders have to be so loud? 🙉
Great idea — a printable checklist would fit perfectly. I’ll pass it on to the team. And yeah, blade grinders are noisy; burrs are usually quieter and more uniform.
Love that — checklist + gear column. We’ll try to include it in the next update.
Totally agree about noise. My downstairs neighbor learned all my morning rituals. 😅
If you publish a printable, put a small column for ‘product used’ (e.g., Electric Burr Grinder with 28 Precise Settings) — helps track gear impact!