How to Make Cold Brew in Your Dorm Without a Grinder
Make Cold Brew in Your Dorm — No Grinder Needed
You can make bold, smooth cold brew with no grinder. Use whole beans or cheap preground. All you need is a jar and water. Steep for 12 to 24 hours. Shocking fact: cold brew often tastes sweeter than hot brew.
What You Need
Make Cold Brew at Home: Simple Steps for Rich, Smooth Coffee
Pick the Coffee Right
Buy coarse grind or improvise — yes, your dorm hacks can workChoose a coffee you like. Buy coarse ground if you have no grinder.
Crush whole beans in a sealed bag if that is all you have. Use a spoon, rolling pin, or an empty can. Hit hard. Roll. Tap. Break the beans into big pieces.
Aim for large, uneven bits. They release flavor slow and clean. Avoid fine powder. Fine grind makes mud. Coarse grind makes clear brew.
Follow these quick tips:
Crush, check, and move on to measuring.

Measure for Consistent Taste
Small math. Big payoff. Want strength you can control?Use a simple ratio. Use 1:8 for ready-to-drink. Use 1:4 for a concentrate.
Measure by weight when you can. Measure with cups if you lack a scale. Measure once and write it down.
Note what you try. Note how it tastes the next day. Repeat the best version. Test one jar, tweak the next. Write it down. Repeat what works.
Combine and Saturate
Wet every grain. No dry pockets. You want full flavor.Put the coffee in your jar. Spread the grounds so they lie level. Use the ratio you measured in Step 2.
Pour cold water slowly. Start with a splash — just enough to wet the grounds. Stir with a spoon to wet every bit. Break any clumps. Lift dry pockets.
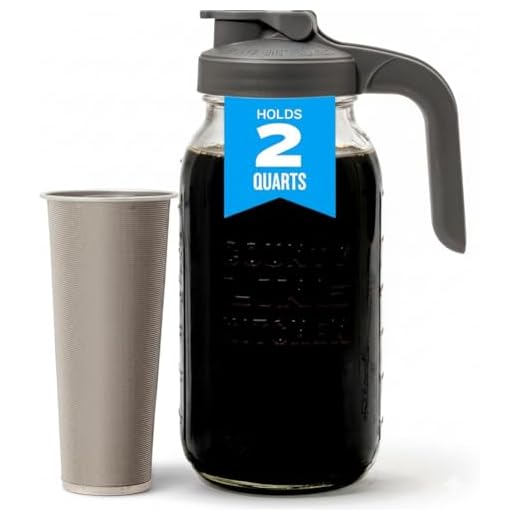
Add the rest of the water. Stop with about 1 inch (2–3 cm) of headspace. Seal the jar with a lid or cover tightly with plastic wrap.
If you use a mason jar, tilt it and pour close to the grounds. You will see the grounds darken as they wet.
Cold water extracts slowly and quietly. That is what makes cold brew smooth.
Let It Steep Slowly
Patience wins. 12 hours beats a rush every time.Place the sealed jar in the fridge or a cool spot. Store it where it will sit undisturbed.
Steep the brew by time, not force. Steep 12 to 18 hours for a mild cup. Steep 18 to 24 hours for a strong concentrate. Do not shake the jar. Let the water work through the grounds.
Mark the start time so you know when to stop. Stick a piece of tape on the lid or set a phone timer. Taste after 12 hours if you must, but wait for the full window for best results.
Longer time brings more body and less acid.
Strain Like a Pro with Dorm Tools
No sieve? No problem. Your sock can be a hero.Line a sieve or funnel with cheesecloth, a paper filter, or a clean thin sock. Pour the brew slowly into another jar. Let it drip. Strain once for a normal cup. Strain twice for clearer coffee. Use a French press to press and pour if you have one. Switch to a finer filter if grounds slip through the holes. Rinse the cloth and hang to dry. Toss used grounds in the trash or add them to a compost bin.

Store, Serve, and Tweak
Keep it cold. Dilute. Dress it up. Make it yours.Seal the cold brew in a clean jar with a tight lid.
Refrigerate. Use within seven days.
Mix concentrate before serving. Combine one part concentrate with one to two parts water or milk. Try 1:1 for bold black coffee. Try 1:2 for a creamier cup.
Serve over ice. Add simple syrup, milk, or a pinch of salt to round the flavor.
Taste and adjust ratio or steep time on your next batch until it fits your cup.
Go Make a Batch
You have the plan and tools. Start small. Taste, note, tweak. Cold brew rewards practice. Keep it simple. Store it cold. Enjoy smooth coffee in your room. Ready to try?
 Previous Post
 Next Post
Instruction: use a sock as a filter. Result: my roommate won’t stop laughing at me.
Seriously though, it worked. If anyone’s worried about hygiene, wash the sock first. 😂
Dedicated sock is now a thing. Also, wrap it around the jar mouth then tie — less mess.
Haha, dorm life ingenuity! Washing first is key — and maybe dedicate one sock as your cold-brew sock (label it?).
I love that this guide mentions storing and tweaking. One thing I do: dilute concentrate 1:1 with water and add a splash of milk when drinking — perfect strength.
Also, if you want cold foamy milk, shake it with a little sugar in a jar for 30s. Cheap frother substitute!
@Marcus sugar dissolves if you let it sit with hot water first, but for cold just use simple syrup or honey — or a little powdered sugar.
Great serving tip, Chloe. Shaking in a jar is a classic — works surprisingly well for froth.
Shake with sugar? Does it sweeten enough or should you use syrup?
I was skeptical about skipping the grinder but this method actually preserved a lot of subtle flavors. Also, measuring by weight changed my life (no more ‘eyeballing’).
One annoyance: some of the paper towels I tried dissolved and made the brew cloudy. Which brands do you recommend for sturdiness?
Thanks — will try Bounty. Also thinking of ordering a reusable nut-milk bag for next time.
Glad it worked! For sturdiness, look for unbleached, heavy-duty paper towels or reusable coffee filters (cheaper over time). Cheesecloth doubled up also works well.
Bounty basic or store-brand heavy-duty worked for me. Avoid the super-thin ‘economy’ ones.
Minor critique: the guide could use a quick troubleshooting section (e.g., what to do if it’s too bitter/too weak). Other than that, super practical for dorms.
Suggestions:
– Too bitter? Shorten steep time or reduce coffee.
– Too weak? Increase coffee or steep longer
– Sediment? Double-strain or use finer mesh
Would also add water quality as a cause — if tap is super chlorinated it can affect taste.
Agree on visuals — even a photo of your rolling pin method would be clutch.
Solid feedback, Olivia — adding a troubleshooting mini-section is a great idea. We’ll update the guide with those quick fixes.
@admin thanks! I think a couple visuals (like how coarse to aim for) would help too.
Tried this last night with a mason jar and my roommate’s old pillowcase 😂 Turned out sooo smooth. I used a medium-dark roast and did 1:8 ratio like the guide said — perfect for iced lattes. Quick tip: press the grounds gently with a spoon before straining to get more extraction.
Love that you included the “no grinder” options. Saved my sleep-deprived self!
Ooh I might try the spoon press. Do you think a darker roast needs less steep time?
Thanks Maya — love the pillowcase hack! Pressing gently is a great trick to squeeze a bit more flavor. If you’re after stronger brew next time, try bumping the coffee slightly and steeping one more hour.
Pillowcase = brilliant 😂 Also works if you wanna make cold brew for a group and don’t have filters. Just be careful cleaning it out afterwards.
Nice guide. I don’t have a jar, so I used a large water bottle and it worked fine. Quick and dirty.
Nice improv, Noah. Any sealable container works — just make sure you can strain easily afterward.
I used a Tupperware once. Pro tip: line it with plastic wrap for easier cleanup.
Okay, long post because I kept messing this up and finally nailed it — sharing for anyone else struggling:
1) I used grocery-store whole beans and cracked them with a rolling pin on a cookie sheet (no grinder)
2) Measured by volume at first and the coffee was too weak, so I switched to weight — so much better
3) Steeped 16 hours in the fridge, but 18 gave me the richest result
4) Strained with a fine mesh and then a paper towel to remove sediment
Totally doable in a dorm. Took me 3 tries but now I’m hooked. Don’t give up!
Yesss the double-strain method. I use a microfilter after the mesh. Saves my teeth from grit!
If someone doesn’t have a scale, a heaping 2 tbsp per 6 oz cup can be a starting point. But yeah, weight is best.
@Riley Haha microfilter is a good idea. I used a paper towel once and it ripped… lesson learned.
Thanks for the detailed write-up, Sofia — rolling pin method is a classic. Your tip about weight vs. volume is gold for consistency.
Solid step-by-step. I’m not a coffee snob but the measuring part really helped — consistent taste for once. One question: does water temperature matter if you’re not using hot water?
I always use filtered water (same temp) — huge difference in clarity and taste. Try it if your tap is meh.
Good catch, Liam. For cold brew we recommend room temp or cold water. Room temp helps saturate the grounds more evenly; cold works too but might take a shade longer to extract. Either is fine for dorm setups.
Curious — what’s the longest you can store cold brew before it loses flavor or goes bad? The guide says store, but doesn’t give a clear timeline. Thinking of making a big batch before a trip.
Good question, Benjamin. Generally 5-7 days in the fridge is best for flavor. Up to 10 days is usually safe if kept cold and sealed, but quality drops after a week.
If you’re leaving town, freeze small portions in ice cube trays and thaw as needed. Keeps longer but may change texture slightly.
I made cold brew without a grinder and without dignity. Ended up with a jar labeled ‘survival juice’ in the fridge. Still tastes better than campus coffee lol.
Hahaha same. Mine’s called ‘liquid motivation’.
Survival juice sounds accurate. As long as it gets you through finals, it’s a win.
Couple of tricks I learned:
– Use coarse chunks so you don’t need a fine filter
– If you only have a single paper towel, fold it into layers instead of trying to force a single thin layer
– Store in fridge up to a week, but drink within 4-5 days for best taste
Also, if your brew tastes flat, add a pinch of salt to the water while brewing — sounds weird but it rounds out bitterness.
Nice tips, Ava. The salt trick is underrated for balancing flavor. Also agree on folding paper towels for strength.
Tried the salt today. Not bad, actually. Mind blown.
@Marcus like 1/16 tsp? Tiny. Start small.
Pinch of salt?? Never heard that. How much is a pinch lol