How to Froth Your Milk in 5 Minutes
Froth Great Milk in Five Minutes
You can make cafe style foam at home. Follow five clear steps. Use cheap tools. Spend five minutes. Get silk microfoam. Lift your coffee. Use quick moves. You will feel proud and sip better in under five minutes, every time.
What You Need

Steam Milk Like a Pro: The Ultimate Step-by-Step Latte Art Guide
Pick and Heat the Right Milk
Whole milk wins? Why skim often fails and why your plant milk can surprise you.Choose milk with fat and protein. Pick whole for the creamiest foam. Pick 2% for good balance. Pick soy or oat labeled “barista” for plant milk that foams.
Pour only what you need. Heat in short bursts in the microwave or warm on low on the stove. Stir to break hot spots. Aim for 55–65°C (130–150°F). Stop before it boils. Test on your wrist — warm, not hot.
Keep your pitcher cool until you heat. Remember: cold milk foams best, heated milk holds foam longer. Clean your tools. Use fresh milk. Old milk will spit and taste flat.

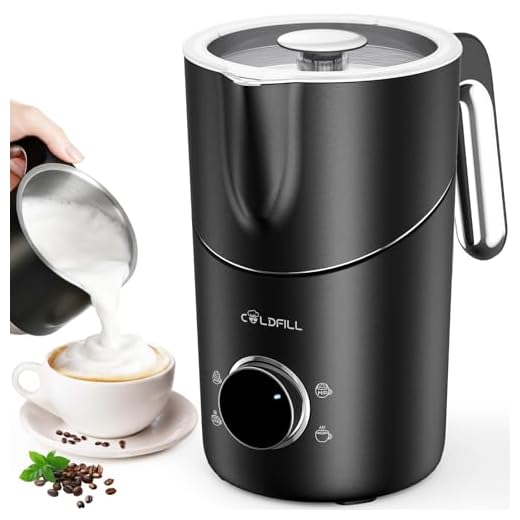
Choose Your Tool and Grip
Hand frother, steam wand, or jar shake? One tool will save you time and drama.Pick the tool you have.
Use a steam wand for the best microfoam.
Use a handheld frother for speed and low cost.
Use a French press to pump air and warm at once.
Use a jar and shake hard for 30–60 seconds in a pinch.
Hold a small metal pitcher with a firm hand.
Place the wand or frother tip just under the surface to start.
Angle the pitcher slightly and keep your wrist steady.
Seal the jar lid and shake hard if you shake.
Test the foam. Seek glossy, tight bubbles, not big suds.
Learn the slight change in angle and depth for each tool.

Create the Foam — The Right Motion
Want barista foam? Use a simple gritty trick. One motion makes silk.Place the tip at the surface.
Turn on the wand or frother.
Let air in for the first few seconds.
Hear a light hiss. Hiss is good.
Lower the tip slightly to fold the air into the milk.
Move the pitcher in a small circle.
Keep the motion steady.
Watch the texture.
Stop when foam grows by about 30–40%.
Avoid creating large bubbles.
Break big bubbles by tapping the pitcher on the counter.
Aim for dense, creamy foam.
Texture and Temperature — Nail the Feel
Silk not froth. Why touch beats the thermometer if you know the signs.Check the heat.
Aim for 60–65°C (140–150°F) for a latte. Cool slightly for a cappuccino.
Hold the pitcher handle.
Stop when you can’t hold it for more than a second.
Swirl the milk to break big bubbles and polish the foam.
Seek a glossy, paint-like texture.
Avoid dry or grainy foam. That means you added too much air.
Add air with short bursts if the foam looks thin.
Match the microfoam to your espresso. Proper foam blends in. Bad foam sits on top and tastes foamy.
Practice often. Each milk and tool will ask for small changes.

Pour, Serve, and Clean Fast
A good pour seals the deal. Clean now or regret it later.Tilt your cup.
Pour slowly from high to sink milk in.
Pour from 4–6 inches for a latte.
Pour lower and faster to bring foam up.
Finish with a gentle wiggle for simple latte art.
Serve right away.
Note that foam loses body in minutes.
Wipe the wand or frother tip at once.
Purge a steam wand if you used one.
Rinse and dry your pitcher.
Clean tools to prevent burnt milk and smell.
Taste, then tweak the next time.
Keep care simple to make better foam and save time on future drinks.

You’re Ready
You can froth milk in five minutes now. Practice the feel. Keep your tools clean. Aim for silk and heat. Try the steps. Share photos and notes. Invite feedback. Make your coffee sing. Start now and show the world today.
 Previous Post
 Next Post
For handheld tools, any preference between battery frothers and electric handhelds? I travel with a battery one but the foam is meh. Gonna try the grip and motion tips in step 2/3 next time.
I bring a battery frother to the office; it’s fine for adding frothed milk to instant coffee but not for latte art. If you’re traveling and care about texture, consider a small hand-pump frother.
Battery frothers are ok for quick cappuccino-ish drinks but they usually over-aerate. If you want smooth microfoam, a compact espresso machine with a wand or a manual hand-pump frother will give better texture.
Concur. Battery = convenience, not quality. Still useful when you just need froth for a mocha at a hotel ☕
This is great for beginners but curious about advanced moves — like stretching foam for latte art or free pouring tulips. Any chance of an advanced follow-up?
Would love a video demo for the tulip and rosette. Seeing the wrist motion helps so much more than text.
Yes — an advanced guide is in the pipeline that dives into stretching, free pour techniques, and troubleshooting art shapes. Stay tuned!
Quick Q: For almond milk, is it better to use the frother attachment or the handheld wand? I have both but almond always turns into big bubbles for me.
Almond milk can be tricky — try the wand with a lower speed and focus on texturizing (submerge slightly after the initial aeration). The handheld electric frother tends to over-aerate it and creates large bubbles.
I second that — handheld frother = bubble city with almond. Wand + patience = smaller, creamier foam. Also try a barista-style almond milk if you can.
Okay, I laughed at some of the comments 😂 But serious: my foam always separates after a minute — looks great at first then watery layer forms. Any fixes?
Also swirl the pitcher before pouring to integrate the foam and milk. That keeps it together longer.
Separation usually means the foam is too airy (large bubbles). Try less initial aeration, focus more on texturizing and breaking down bubbles. Also serve right away — foam stabilizers in some milks help.
Not gonna lie, I was skeptical but the “right motion” step made a real difference. My foam used to be either soup or marshmallow — now it’s in between (in a good way).
Also, tiny rant: why do steam wands leak when you’re in the zone? 😅
PS: anyone else accidentally splash milk on the counter like a maniac while learning?
Splashing is part of the process. Use a towel under the pitcher and your cleanup becomes less tragic.
Hahaha it happens. Leaks are often from a worn gasket or a loose tip — worth checking if it’s frequent. And yes, learning days = counter splashes are basically a rite of passage.
I once steamed for 2 minutes straight bc I spaced out. Counter looked like modern art. 😂
You can also angle the pitcher slightly away from you at first to minimize splatter. It helped me a lot when I was starting out.
If the wand spurts when you start, try starting with it just above the milk surface and then lowering it once the vortex forms — less splash.
Loved the step-by-step format. Super easy to follow.
One suggestion: add a quick list of ‘common mistakes’— like overheating, too much air, wand too deep — with one-line fixes. Would save newbies some time.
Awesome idea — we’ll add a ‘Common Mistakes’ mini-section with quick fixes. Thanks for the suggestion!
Yes please. A ‘do/don’t’ checklist would be perfect for lazy mornings.
This guide is solid, but can we talk about temperature a bit more? I keep hearing different numbers (55°C, 60°C, 65°C). What’s the sweet spot for a velvety texture without scalding the milk?
I mostly make lattes and occasionally cappuccinos. Also, are there visual cues I should watch for if I don’t use a thermometer?
I use the ‘back-of-hand’ trick — if the pitcher is too hot to touch for more than 2s, it’s probably over 65°C. Not perfect but useful.
Good question. Aim for ~60°C (140°F) for a silky latte texture. For cappuccinos, you can go a touch higher but avoid 70°C+. Visual cues: pitcher should feel hot but not unbearable to hold for a few seconds, surface should look glossy and slightly domed, and steam should have a quiet chugging sound rather than loud splutters.
Also different milks plateau at different temps — oat tolerates higher heat than some almond brands. So that 60°C is a great baseline but adapt slightly.
Also, watch for big bubbles at the surface — that means too much aeration. Stop adding air and submerge the wand to texture.
Wanted to add: water quality matters. If your steam has funky taste or the wand leaves residue, descale regularly. Also try a different milk brand if foam is inconsistent — weird but true.
Solid tip. Hard water can cause scale and off-flavors. Regular descaling and using filtered water helps both machine longevity and taste.
Descaling schedule: monthly for heavy use, every 3-6 months for home use. Saves headaches later.
I found switching to a local brand oat milk improved texture and flavor — sometimes manufacturers add stabilizers that affect frothing.
Agree on filtering water — made a noticeable difference in steam pressure on my older machine.
I appreciate the ‘clean fast’ part — as a nightly cleaner it’s nice to not have to babysit the machine. Quick question: should I remove the tip for soaking every day or only weekly?
I soak nightly — feels excessive but I hate dried milk. Depends on how many drinks you make.
If you’re the only user, weekly is usually enough. For multiple users, daily or every couple days.
Daily: wipe and purge right after use. Tip removal and soak is fine weekly unless you notice buildup sooner, in which case do it more often.
Tried the pouring tips in step 5 and my latte art actually looked like something other than a Rorschach test. Huge win.
One nitpick: the cleaning section was a bit short — I had to google more about soaking vs. wiping. Maybe add a quick checklist for cleaning after each use?
Yesss to purge immediately. Saved my machine once after a clog from dried milk. Also a soft brush helps for the tip.
Thanks — good point. Quick checklist we’d recommend: purge wand immediately, wipe with a damp cloth right after steaming, run steam for 1-2s after wiping, and deep soak the tip at the end of the day. We’ll expand that section.
Love this — tried the five minute routine this morning and it actually worked!
I used oat milk (barista blend) and warmed it to about 60°C like you suggested. The foam was silky, not bubbly.
Tip: tilt the pitcher a bit and keep the wand just under the surface for the first 10–15s to get air in, then lower it to texturize.
Also, remember to purge the wand after steaming or you’ll get gross sputters next time 😂
One thing — my thermometer is busted so I went by feel. Still, awesome guide!
Same here with the thermometer mishap. I count to about 6-7 from cold and check the pitcher — warm but not too hot. Works most days.
Sweet — I always overheat my milk and end up with sad foam. How long did you steam total? I’m guessing around 30-40s?
Nice! Glad the oat milk worked for you — barista blends usually behave best. Great tip about starting just under the surface then lowering for texturizing.