How to Descale Your Keurig at Home for Seniors — Quick, Safe Steps
Good Coffee Starts Clean
You love warm, simple coffee. Scale steals taste and heat. You can fix it fast. This clear guide shows safe, easy steps you can do at home, with confidence today.
What You Need

Descaling a Keurig: Simple Steps for a Cleaner Brew
Prepare and Check Your Keurig
Small prep beats big repair. Want an easy, safe start?Begin slow. Move steady. Read each line.
Pick a Safe Descaling Method
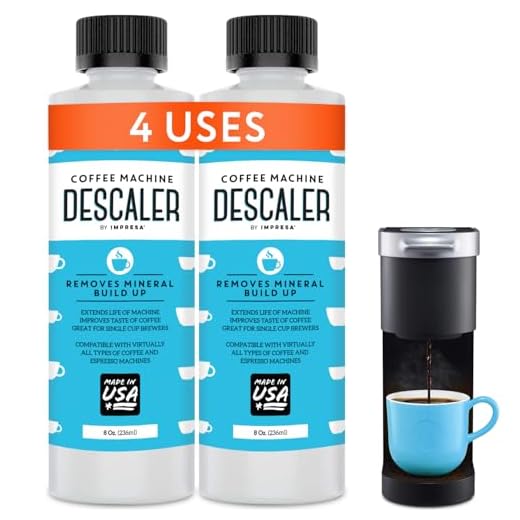
Vinegar or store mix? One smells. One costs more. Which fits you?Decide which descaler to use.
Choose white vinegar for cheap, mild scale.
Expect a strong smell and plan for fresh air.
Choose a store descaler for less smell and easier rinse.
Read the product label now.
Check your Keurig manual for model warnings.
Follow the maker’s rule if it forbids vinegar.
Open a window before you start.
Wear gloves if your skin is thin.
Ask a friend to help if you have trouble lifting the tank.
Keep medicine away from the sink.
Pick a sunny day to work if you can.
Stop and go outside if you breathe hard or feel faint.
Call for help if you need it.
Pick a bottle you can pour with one hand.
Mark the bottle with a bright sticker so you find it quick.
Use a small bottle you can grip and tip with your thumb.
Keep the descaler instructions near the machine.

Run the Descale Cycles
Let the machine drink. Your coffee will thank you.Mix the solution. For vinegar, use one part white vinegar to two parts water (example: 1 cup vinegar + 2 cups water).
Follow the label dose if you use a store descaler.
Pour the mix into the water tank. Put the tank back. Place a large mug under the outlet. Plug the brewer in. Do not place a pod. Turn the machine on. Start a brew cycle. Let the machine run into the mug. Stop after a half tank if your model allows.
Let the solution sit in the machine for 15–20 minutes. This breaks the scale. Run more brew cycles until the tank is near empty. Use a fresh mug or bowl each time to catch the liquid.
Let the brewer sit for five minutes after the cycles finish. Open the lid and wipe visible scale with a damp cloth. Rinse the K‑cup holder and needle. Use a soft brush on the needle. Do not push hard. Repeat the brew and soak if you still see scale in the tank. Take your time. Clean the spill and dry the area. Run one test brew with plain water first then.
Rinse Thoroughly Until Clear
No one likes vinegar in their cup. Rinse until taste and smell leave.Empty the mug. Fill the tank with fresh cold water. Put the tank back.
Run a full brew cycle with plain water. Dump the water. Repeat three to five times.
Watch the water in the mug. It should run clear. Smell the water. No vinegar smell should remain.
Do more rinse cycles if you still smell vinegar. For example, run two more full cycles and smell again. Flush until the taste is clean.
Clean the drip tray and the reservoir lid. Wipe the outside of the tank. Dry all parts well.
Replace the K‑cup holder and any parts you removed. If your machine has a water filter, wash or replace it now.
Run one final brew into a cup. Taste the water. Make one small coffee. Taste the coffee. If it tastes clean, you are done. If not, rinse again.
Wipe the machine body with a damp cloth. Dry the cord. Note the date. Set a reminder in your phone or on the fridge.
Final Checks and Smart Habits
Do these quick checks. They keep the machine young and your brew true.Put the tank back in place. Run a short brew with plain water. Make one small coffee. Sit and sip. Check the taste. Smell the cup. Check that the brewer runs quietly. Tighten any loose parts you find.
Clean the work area. Wash the cloth you used. Store the descaler where children and pets cannot reach.
Write the date on your calendar. Set a phone reminder. Ask a friend to help lift or move the brewer next time, if it is heavy. Stop using the machine if it leaks or makes odd sounds. Call the maker or a repair helper.
Maintain good habits:
Pat yourself on the back. Your coffee will thank you. Enjoy it.

Done. Enjoy Your Coffee.
You cleaned your Keurig. It is safe. Bad taste is gone. Note date. Drink slow. Plan next clean in three months. Ask for help if needed. Try. Please share results.
I followed this guide but found that the rinse stage in the instructions felt a bit short for my tastes. I did three rinse cycles and still caught a faint aftertaste. Maybe add a note: if you still smell descaler, keep rinsing (I ended up doing 6 cycles). Also, there’s a typo in step 2 (‘Pick a Safe Descaling Method’ has an extra space) — minor, but noticed.
If you used vinegar, that might require extra rinses — commercial descalers often rinse away faster.
Six cycles sounds like overkill but better safe than leftover taste. I usually do 4 and it’s fine.
Thanks for the heads-up, Helen — we’ll fix that typo. And great practical advice: keep rinsing until there’s no smell. Some users with smaller reservoirs need more cycles to fully clear the lines.
Quick Q: does the procedure change much for older Keurig models vs the newer ones with touch screens? I’m holding onto a 2014 model and want to make sure I don’t press any buttons I shouldn’t 😅
Good question. Core steps are the same: prepare, descale, rinse. Newer models sometimes have a ‘descale’ mode/button that automates timing — with older models you manually run cycles. Check your manual for model-specific notes, and when in doubt, unplug before any internal checks.
I have a 2013 Keurig and followed the same steps — just no fancy descaling indicator, so I set a timer like Dorothy suggested.
Also consider water filters—some older models have them under the reservoir. Replace after a descale if it’s been a long time.
Yeah, older models are more manual but less likely to have tricky software prompts. Just run the full reservoir through like the guide says.
Helpful guide but I’m picky about concentration. The guide mentions mixing a descaler but doesn’t give ratios for diluted solutions vs. full-strength. For the brand I use, the bottle says mix 1:3 (descaler:water) — anyone else follow a specific ratio?
Also wondering if running two descale cycles back-to-back is overkill or okay for older machines.
Also a reminder: always rinse thoroughly until the water runs clear and odor-free — that helps remove any remaining solution.
Thanks Marcus. Helpful to hear from someone using the same brand.
I once did two cycles and my Keurig was fine after that. Just rinse well.
Good point, Greg. Ratios depend on the descaler brand — always follow the product label. Running two descale cycles can be okay if buildup is heavy, but avoid letting the descaler sit longer than recommended to protect internal parts.
I use the 1:3 mix too. For older machines, one thorough cycle + letting it sit the recommended time usually does the job. Two cycles is fine if it’s really clogged.
This guide was super clear — thank you! My mom is 78 and was nervous about descaling her Keurig, but the step-by-step made it doable. I liked the “Pick a Safe Descaling Method” part because we ended up using an approved descaler instead of vinegar.
Quick note: I unplugged the machine while refilling the reservoir like you suggested. Felt safer that way.
Thanks for sharing — gives me confidence to help my dad do the same! 🙂
Glad it helped, Laura! Using an approved descaler is a good move for older machines. If your mom’s Keurig has a water filter, remind her to replace it after a few rinses — it keeps flavors fresh.
Totally — approved descalers are gentler on the internals. Vinegar can leave a smell if not rinsed well.
As a senior who loves her morning cup, I appreciated the safety tips. A couple of extra details I followed:
1) I used a towel under the machine to catch spills.
2) I set a timer when the descaler needs to sit — I’m prone to getting distracted.
3) Did four rinse cycles just to be sure. No harsh smells afterwards.
This guide is easy to follow for older folks, thank you.
Fantastic practical tips, Dorothy — towels and timers are perfect senior-friendly helpers. Thanks for sharing!
Those are solid habits. I’m stealing the timer idea 😂
Four rinse cycles sounds smart. I usually do two and still get a vinegar whiff sometimes.
Thanks — followed the guide and saved my boyfriend’s favorite machine. Small tip: replace the charcoal water filter after descaling; it seemed clogged and new filters made a real taste difference. 🙂
Nice save! Filters are like the unsung heroes of good coffee.
Awesome tip, Tina — replacing the charcoal filter post-descale is a great habit. It restores flavor and prevents recontamination.
Okay, confession: I once tried to multitask and ran a rinse cycle while making toast. The Keurig started gurgling like it was auditioning for a horror movie. 😂
After reading this guide I actually followed the steps (shockingly) and did the full descale properly.
Longer-term tip: I schedule descaling every 3 months because we have hard water. No regrets.
Also — unplug the machine when checking the inside, folks. Don’t be like past-me.
Lol the horror movie image 😂 Thanks for the timeline — 3 months sounds doable.
Same here — gurgles are the worst. Also, if you let the descaler sit for the recommended time it helps loosen mineral buildup more efficiently.
Ha! Multitasking with appliances is a gamble. Scheduling every 3 months is reasonable for hard water. If you want, you can try a water softener or filtered water to stretch that interval.
Good reminder about unplugging. Seniors should always be extra cautious — better safe than sorry.
Short and sweet: did the descale. Coffee tastes like a dream now. 10/10 would recommend. ☕️
Nice! Enjoy that first post-descale cup — it’s always the best.
Glad it worked out, Samir! Enjoy the upgraded coffee.
Nice guide! Quick question: how often should a Keurig be descaled for someone who drinks 2–3 cups a day? I live in an area with “meh” water quality. 🤷♀️
For moderate use (2–3 cups/day) and average water, every 3–4 months is a typical recommendation. If you notice slower brew times or odd tastes, do it sooner.
You can also use filtered water to reduce frequency — that helped me stretch to every 4 months.
If you have hard water, aim for 2–3 months. Otherwise 3–4 months should be fine.
This actually made my kitchen smell better — the machine stopped producing that faint mineral smell after a few rinses. Loved how the ‘Rinse Thoroughly Until Clear’ step was emphasized. Simple but crucial.
Exactly — rinse until clear and odor-free is key. Glad you noticed the difference, Nina!
Yes! The smell change is the best immediate payoff. You know it worked when the machine stops trying to smell like a science lab.
Good walkthrough but I think the guide could emphasize checking/replacing the water filter more. I skipped that once and the coffee still tasted off after descaling.
Maybe add a quick checklist: unplug, remove pod, remove filter, check for scale spots, then descale? Just a thought.
Agree. I always forget the filter and it messes with taste too. A checklist would be clutch.
Great suggestion, Ethan. We try to cover filters under ‘Prepare and Check Your Keurig’ but a visible checklist would definitely help readers follow the flow.