Make Your Coffee Sing: Conical-Burr Hand Grinder Reviews
Make Your Coffee Sing: Why a Conical-Burr Hand Grinder Matters
You want better coffee. You want control. A conical-burr hand grinder gives you both. It grinds beans cleanly and evenly. It keeps heat low. It fits in your hand and your bag.
This guide shows what matters. You will learn how grind size shapes taste. You will see which features matter for travel, espresso, pour-over, and value. We test like a barista. We measure consistency, speed, feel, and clean-up. Expect clear facts and hands-on notes. Make your coffee sing. You can dial your grind. You can save beans. You can enjoy every cup. Start here. Read on now and learn.


The KinGrinder P1: Why a Budget Hand Grinder Has Me Excited
How Conical Burrs Work and Why They Matter
The core action
You bite into a bean. Conical burrs do the same. One cone sits inside another. The bean falls between them. The cones scrape and crush. They cut more than they tear. That gives you cleaner particles. Cleaner particles mean even extraction. Even extraction means fewer bitter spots and more clarity in the cup.
Parts that do the work
You can point to three parts.
Each part changes the cut. A small shift makes big taste changes. You learn to feel the clicks. Count them. Use the same click counts each time.
Heat and speed
Hand grinding is slow. That is good. Slow means less friction. Less friction means less heat. Heat kills aroma. Conical burrs also shed heat better than flat burrs. You keep more volatile oils. Your cup will smell like fresh fruit, not cooked sugar.
Design and material matter
Steel burrs hold an edge. Ceramic burrs stay sharp long and resist rust. Deep flutes move grounds faster. Steep flutes make fine grounds fast. Cheap stamped cones wobble. High-precision machined cones give tighter particle spread. Models to note: Baratza Sette for high-speed, 1Zpresso for solid build, and the JavaPresse for travel.
Quick, usable tips
Keep your hands steady. Grind the same way each time. You will hear the difference in your cup.
Key Features to Judge a Hand Grinder
You must know what to look for. Each choice changes the cup. Read these points like a checklist. Use them in a shop or when you read a review.
Burr material
Steel bites fast. Ceramic stays sharp and won’t rust. Steel = speed and bite. Ceramic = silence and longevity. Pick what matches your routine.
Grind range and step size
Does it reach espresso fine and French press coarse? Can you make tiny moves for espresso? Steps matter. Big jumps ruin a shot.
Consistency from fine to coarse
Look for a tight particle spread. Fewer fines and boulders give even extraction. If your brew tastes muddled, the grinder is likely the weak link.
Build and feel
Metal parts feel solid. Plastic wiggles. A firm crank and clean threads mean repeatable settings. You should feel the same motion every time.
Hopper and catch capacity
Will it hold enough beans for your cup? Small hoppers suit travel. Larger ones suit mornings at home. Bigger catch cups keep hands clean.
Ease of adjustment
Clicks you can count are gold. A marked dial or numbered ring saves trial and error. If it slips under load, you will curse.
Portability and weight
Light and compact for travel. Heavier for bench use. If you carry it, weight matters. If it stays on a counter, weight gives stability.
Noise and torque
Hard beans need torque. Cheap grinders stall. Torque affects grind speed. Noise matters in a hotel or dawn kitchen.
Price and warranty
Higher price often buys fit and finish. Warranty lets you gamble less. A good warranty tells you the maker stands behind the parts.
Your pocket checklist:
Next, we match these traits to real grinders for travel, espresso, pour-over, and value.
Best Picks by Use Case: Travel, Espresso, Pour-Over, and Value
You brew in different ways. You need different grinders. Here are the best picks by use case. Short, clear, and useful.
Travel: small, light, and fine-capable
Pick a grinder that fits a bag. It must grind fine enough for espresso if you need to. Locking lids help. Pack a cloth for grit.
Examples: Timemore Nano, Porlex Mini, 1Zpresso Q2. I used a Timemore Nano on a week-long hike. It never complained.
Espresso-capable: tight settings, stable shots
You need fine range and tiny adjustments. The turn must be firm. The frame must not flex under pressure.
Examples: 1Zpresso JX/JX-Pro, Timemore Chestnut, Kinu M47.
Pour-over: even particles, steady flow
You want a smooth pour and a clean cup. Consistency matters more than raw fineness. Look for grind uniformity and speed.
Examples: Comandante C40, Timemore Chestnut, 1Zpresso Q2.
Best Value: punch above price
You want great results without buyer’s remorse. Look for solid burrs and good build. Expect to crank a bit longer.
Examples: JavaPresse, Hario Skerton Pro, 1Zpresso JX.
Hands-On: How We Test and Review Grinders
The plan in plain steps
You want real results. You do the same small tests on each grinder. You keep the variables tight. Same beans. Same roast. Same dose. Same water. You score what matters.
Grind uniformity
You weigh 20 g. You grind to a set setting. You spread the grounds on white paper or a tray. You look with a loupe or phone macro. You score how many fines and boulders you see. A tight spread wins. This maps to a cleaner pour-over and steadier espresso.

Time, speed, and retention
You time the grind for 20 g. You note seconds per gram. You shake the burrs, tap the hopper, and weigh retained coffee. High retention means wasted beans and stale tastes. You test heat by touching the casing after one and three minutes, or use an IR thermometer. Heat tells you if oils will bloom or burn.
Ease of use
You judge the crank, the detents, the scale, the hopper, and the grind collar. You note how the grinder holds together under a firm crank. You mark how easy it is to change settings.
Taste test (cup it)
You brew a cafetière and a 18–20 g pour-over. You keep brew time and ratio fixed. You sip. You write notes: brightness, sweetness, body, muddiness. The cup tells you what the lab notes miss.
How to repeat this at home
You use a kitchen scale, stopwatch, phone macro, and the same beans. Run the steps twice. Log results. Compare numbers, not ads. Honest reviews show data and photos. They show limits and faults.
Next, you will use those numbers to dial into shots and brews.
How to Dial In Your Grinder for Every Brew
Start with a baseline
Pick the brew you want. Set a clear recipe. For espresso try a fine start you can tighten. For pour-over pick a medium-fine start. For French press pick coarse. Note the grinder model and mark the setting. A quick rule: write dose, time, and setting. That is your baseline.

Make one change at a time
Turn the dial. Move one notch if your grinder has detents. Turn a quarter to half turn on stepless grinders. Grind, brew, taste. If the shot is bitter, go coarser. If it is sour, go finer. Small moves matter. A single click can flip a shot.
Targets to aim for
Watch extraction and taste
Time the brew. Smell and sip. Bitter, drying, or hollow tells you extraction is off. Sour and thin means under-extracted. Keep a log: date, bean, roast, grinder, setting, dose, time, notes. You will see patterns fast.
Speed tricks that work
Keep the changes tiny and the notes clear. In the next section you’ll learn how care and simple fixes keep that dialed setting true for years.
Care, Troubleshooting, and Longevity
Daily care in minutes
Wipe the hopper. Tap out loose grounds. Brush the exit chute with a stiff brush. Blow once or twice with canned air or a quick puff. Do this after each use when you switch beans or roast levels. It takes a minute. It keeps grind steady.
Deep clean and burr removal
Take the top off. Remove the handle and the top burr per the manual. Brush both burrs. Rinse any removable parts if the maker allows it. Dry fully before reassembly. For oily beans, clean more often. You will notice a sweet change in taste after a good clean.

Quick fixes: wobble, inconsistent grind, stuck handle
Parts, alignment, and when to replace
Check bearings and the shaft for play. If the burrs sit uneven, re-align per the manual. Replace burrs when you need more force to grind or you see dulled teeth. Brands like 1Zpresso and Timemore sell spare burrs and rebuild kits. Keep receipts and serial numbers for warranty claims.
Storage and long life
Store dry and cool. Do not leave beans in the hopper for days. Use a small silica packet if your kitchen runs humid. Treat the grinder like a tool. Clean it. Tighten it. Rotate parts when needed. It will repay you with the same grind day after day.
Keep these checks handy. The Conclusion will help you choose and commit.
Pick One, Grind, Taste, Repeat
You now know what to seek. You can read reviews with sharp eyes. You can test at home. A conical‑burr hand grinder gives you control. It lifts your coffee.
Pick the model that fits your brew and your hand. Grind. Taste. Adjust. Make your coffee sing. Then share what you found. Keep grinding. Keep listening. Return to beans you love. Try new ones. Enjoy the small wins in the cup. Repeat often, with joy daily.
 Previous Post
This line cracked me up: “Pick One, Grind, Taste, Repeat.” My neighbors hear me grinding and think I’m smuggling sandpaper 😂
On a serious note — hand cramps are real. The Portable Manual Coffee Grinder, 40 Adjustable Settings felt like a wrist workout. Anyone got form tips or recommended handles that reduce strain?
Haha — we get that a lot. For hand fatigue: shorter strokes at a faster cadence, or using a small travel clamp to hold the grinder steady help. Also consider a larger-handle manual grinder (more torque, less force). We’ll add a short ergonomics subsection.
Try gripping closer to the center of the wheel and keep your wrist neutral. Using your whole arm (not just wrist) cuts the pain down.
Thanks for putting longevity front-and-center. I replaced the burrs on an older OXO Conical Burr Coffee Grinder, Stainless Steel last year and it performed like new. The article’s troubleshooting section saved me a service call — especially the part about checking for uneven burr wear.
Also, for folks debating electric vs manual: if you brew multiple daily and need speed/consistency go electric; if you want control and low maintenance, manual is king. YMMV.
One more tip: keep a spare set of burrs or a cheap backup grinder for travel. Saved my trip once when airport security confiscated my bigger grinder (weirdly).
Agreed on parts — it’s surprising how many brands hide replacement burrs behind weird model names. OXO’s parts are easier to find than some others.
Exactly — burr replacement is often cheaper than a whole new unit. We try to recommend models with accessible replacement parts where possible.
Travel grinders: the On The Go 135 Manual Conical Burr Grinder was my pick after reading this piece. Super compact, handles 10–12g easily, and surprisingly consistent. No replies needed, just wanted to say the travel section nailed it. 👍
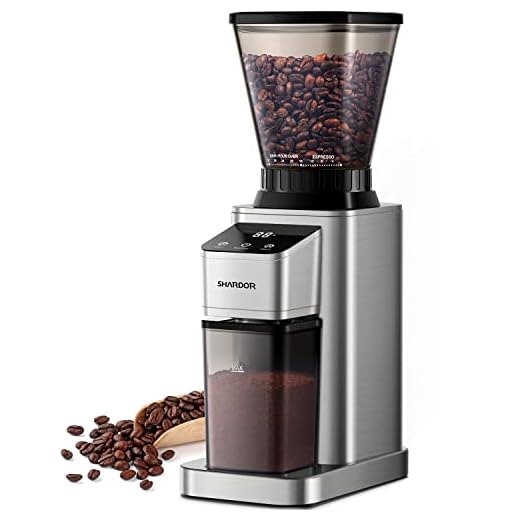
Question: The SHARDOR Professional Conical Burr Grinder with touchscreen caught my eye for espresso, but the article flagged durability concerns. Has anyone used it daily for a year? I’m looking for something consistent that can handle fine settings without slipping. Also, how realistic is the ‘40 settings’ marketing vs real usable steps for espresso?
I brew both espresso and pourover so I need versatility — hate switching grinders mid-week.
Emily — great question. In our tests the SHARDOR has a lot of features (and the touchscreen is cool), but build quality varies across units. For daily espresso you want precise, repeatable adjustment; on some SHARDOR units we noticed slight drift over months. ‘40 settings’ can be useful, but what matters is the range and how linear the adjustments are — some models have many clicks but not much difference between adjacent ones at the fine end.
If you want both espresso and pour-over without swapping, consider a grinder with a wide adjustment range and a clear detent system. The OXO models and some higher-end manuals tend to be more stable long-term.
I used a SHARDOR for ~8 months at home. It made decent shots but I did end up recalibrating/grinding more often. If you want rock-solid, a sturdier burr platform or a higher-tier manual often wins for consistency.
I’ve had the touchscreen model for ~10 months. It’s great for dialing in right away, but mine started showing tiny jumps after heavy use. Still good for home but maybe not pro-level longevity.
Quick question — are replacement burrs available for the SHARDOR and the cheaper Mini Manual units? The article mentions longevity but not part availability. Also: anyone tried the On The Go 135 for espresso? I’m skeptical it can go fine enough.
Good questions. SHARDOR generally has replacement burrs through some online sellers, but availability varies by region — check the model number. For many budget Mini Manual grinders, replaceable burrs are less common; sometimes entire top assemblies are swapped instead.
On The Go 135: it’s primarily a travel/manual pour-over grinder — not ideal for true espresso (too coarse range and limited dose).
We’ll add a small matrix to the article listing which models have documented replacement parts and where to look — thanks for the prompt.
I bought replacement burrs for a SHARDOR on a third-party site last year — they fit but double-check specs. As for the On The Go 135, I tried it for ristretto once and it was meh. Good for aeropress/pourover.
If replacement burrs are hard to find, consider buying a spare inexpensive manual as a backup. Cheaper than losing a week of good coffee when something breaks.
Really thorough article — especially liked “Hands-On: How We Test and Review Grinders”. That transparency matters.
Care/Troubleshooting tip from my side: if your grinder starts sticking at a certain setting, disassemble and inspect the burr alignment and any trapped oils/residue. I had a Mini Manual Coffee Grinder with 40 Settings that gummed up after oily beans — a quick soak (disassembled) and a dry brush fixed it. Also, investing 10 mins to log your settings for each bean helps so you don’t repeat the same bad grind when you switch varieties.
Small request: could you add a printable cheat-sheet for dial-in increments per brew type? would be handy.
Seconding the log idea — I keep a little notebook beside my grinder. Saves so much time when I’m testing new beans.
Did you use hot water for the soak? I’m nervous about the glue/adhesives in some cheaper grinders.
Great practical tips, Priya — thanks! A printable cheat-sheet is a solid idea; we’ll add a downloadable PDF with start points for espresso/pourover/french press and troubleshooting flow. Appreciate the cleaning note too.
Note added: we’ll include specific cleaning steps per model type (metal vs plastic components) in the care section. Thanks for flagging safe cleaning practices.
Maya — I used a VERY brief warm water + mild soap soak only on the metal parts, then air-dried for 48 hours. Don’t soak plastic housings. And always check manufacturer guidance if unsure.
Loved this roundup — finally something that treats grinders like actual tools, not accessories.
I own the JavaPresse Manual Conical Burr and take it on weekend trips. It’s not the fanciest but the bite-to-bite consistency for pour-over is solid if you’re patient. The section on “How to Dial In Your Grinder” was super helpful — the step-by-step made me actually tweak my grind beyond ‘fine/medium/coarse’.
Minor gripe: the article didn’t call out how annoying static can be with some plastics. Also, anyone else find the OXO stainless surprisingly heavy for travel? 😂
I’ve been using the JavaPresse too — for travel it’s perfect. For less static I wipe the catch cup with a tiny bit of moisture on a paper towel before grinding (works surprisingly well).
Thanks Sarah — great point about static. We’ll add a tip about anti-static techniques (drying beans a bit, tapping the grind container, or using a small brush). And yes, stainless OXO models tend to be heavier but more durable; trade-offs!
Good read. I went straight for the OXO Conical Burr Grinder, Matte Black Finish after the article — looks slick on my counter. Not gonna lie, feels a bit like buying perfume for my kitchen but the grind is actually legit. Thumbs up.
Agreed — the matte finish hides stains better than stainless. Also less brittle-looking fingerprints lol.
Glad you liked the matte black — it’s one of our favorites for looks + performance. If you ever try dialing for espresso, check the espresso section — you’ll want to go much finer and do small step adjustments.