Nail Your Dose: One Spoon, Better Coffee
Why Measure? The One-Spoon Promise
You want a better cup. You want it every time. A single, proper scoop will change your coffee. It gives you control. It strips guesswork. Use one spoon and you tame your brew. You learn how dose shapes flavor. You learn what to adjust.
This guide shows clear steps. You will learn the right spoon, the right scoop, and the right care. You will match spoon to grind and method. You will calibrate and keep it honest. Small tool. Big difference. Start here. Master the scoop. Taste will follow. Be exact. Always.


How to Put a Spoon of Instant Coffee into a Small White Cup — Quick Life Hack
The Case for Precision: How a Spoon Shapes Flavor
Dose and balance
You taste what you brew. Dose changes strength. It also shifts balance. More coffee makes the cup darker and thicker. Too much pulls bitter notes. Too little leaves thin, weak coffee. Think of dose as a lever. Move it a little. The taste moves a lot.
A good rule for drip is 1:15 to 1:18 — one part coffee to 15–18 parts water. Push toward 1:15 for a bolder cup. Slide to 1:18 for a lighter brew. Small shifts matter. A 5% change in dose can make a flat cup bitter or weak.
Why grams matter
Grams give you the truth. They tell you exactly how much coffee you used. The body of the cup, the sweetness, the bite — all follow the grams. A spoon can be vague. You can level it one day and heap it the next. That is enough to change the taste.
But a spoon can work like a scale if you treat it like a tool and not a guess.
When a spoon works
Weigh your spoon once. Note how many grams a level scoop holds for your grind. Then use that scoop as your unit. For example:
Write those numbers down. Use the scoop the same way each time. Grind and tamp the same. You will brew repeatable cups without a scale in the morning rush.
Quick, usable tips
You now know why small weight changes bend flavor. Next, you will learn how to match the exact spoon to your grind and your method.
Know Your Spoon: Types, Sizes, and Real Capacity
Types and real shapes
Spoons come in many faces. Teaspoons are small and shallow. Tablespoons are deeper. Coffee scoops are wide and short. Some are level. Some you heap. Each shape packs coffee differently. A rounded scoop hides air. A level scoop reveals volume. You must know which you use.
Volumetric versus weight
Volume lies in teaspoons and tablespoons. Weight lies in grams. Water links the two: 1 ml of water = 1 gram. Coffee is lighter than water. A teaspoon stamped “5 ml” will not weigh 5 g when filled with ground coffee. Read the stamp. Use it as a starting point, not the final word.
How to test your spoon
Weigh method: zero your kitchen scale. Place the spoon. Add coffee until level. Record grams. Repeat three times. Average the result. Water method: fill the spoon with water to the brim. Pour into a measuring cup. Read ml. Convert ml to grams for a rough estimate.
Real tools speed this test. Try an Etekcity or the Maestri House scale. They give quick, repeatable reads. Brands to consider: OXO Good Grips measuring spoons, Norpro stainless coffee scoop, Hario wooden scoop for beans.
Common spoon volumes and typical doses
Pick or mark your spoon
Pick one spoon. Test it. Mark the handle with tape or a pen. Write the gram value. Use it the same way every time. That small habit fixes a lot of morning guesswork.
Next, you will learn how to match that spoon to your grind and brew method.
Match the Spoon to Your Grind and Method
How grind changes fill
Grind size changes what your spoon holds. Coarse bits sit loose. Fine dust packs tight. The same spoon can hold 20–30% more mass when the grind is fine. That change shifts strength and taste. You must see it and act.
Pick one reference spoon
If you know your spoon reads ~7 g, use it as your yardstick. Mark it. Test it. This keeps your math simple when you switch grinds or machines.
Method-by-method quick guide
Use these as starting points for one 8 oz (240 ml) cup. Adjust by one spoon to taste.
Judge by yield and extraction
Watch yield and taste. If the cup is weak, add a spoon or go finer. If it’s bitter or muddy, remove a spoon or go coarser. Long brew time extracts more. Short brew time extracts less. Use dose and grind as a pair.
Simple rules to keep balance
How to Use Your Measuring Spoon Step by Step
Step one — level or heaped
Decide before you scoop. Level gives repeatable strength. Heaped gives more body fast. Use level for pour-over and drip. Use heaped for French press when you want more heft. For espresso, dose by weight. If you must spoon, go slightly heaped and test.
Step two — scoop and transfer
Scoop straight down. Do not stir the bag. Fill the bowl and tap once to settle. Level with the back of a knife for a clean read. Transfer in one steady motion. Avoid spills. A steady pour keeps dose uniform from cup to cup.
Step three — tamp, stir, or leave
Most brews do not need tamping. Stir or bloom when the recipe calls for it. For pour-over, pour slow and let the bloom breathe. For French press, stir once after adding water. For AeroPress, a gentle plunge is enough. For espresso, you tamp and watch pressure and time.
Quick checks while brewing
Dosing for one cup vs a crowd
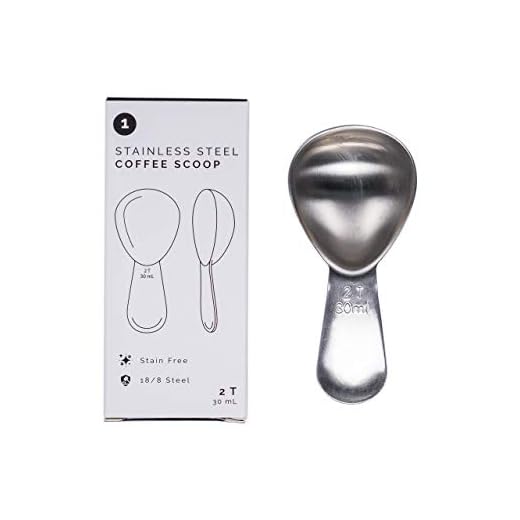
For a single cup, dose fresh and use the same spoon each time. For many cups, pre-measure into a large container. Use a 2-tablespoon scoop (like the IZEL… above) to speed service. Heat loss matters with big batches. Taste as you pour and tweak one spoon at a time.
Use these steps. Keep notes. Adjust by one spoon. Taste as you go.
Buy Smart: What to Look for in a Coffee Measuring Spoon
Fit and finish first
You will buy a tool that lasts. Pick a scoop with a solid handle. Look for a bowl that sits flat when you set it down. Seek clear volume marks—stamped or etched, not painted. Make sure the length fits your grinder hopper and your storage jar. A too-short handle forces spills. A too-long handle clanks in the drawer.
Materials: stainless steel, plastic, bamboo
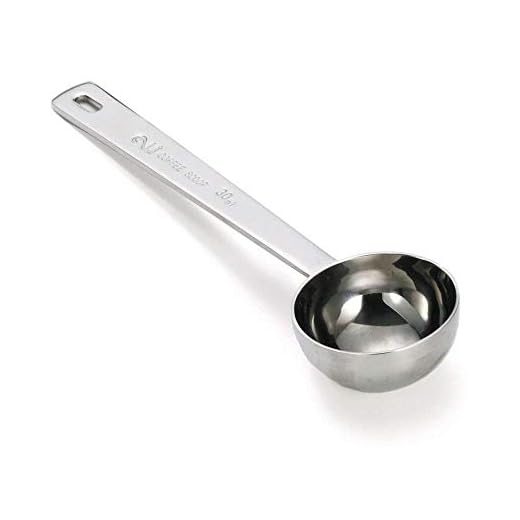
Stainless steel: heavy. Durable. Easy to clean. Keeps marks and shape. Works in hot beans and the sink. Try OXO Good Grips or JavaPresse styles if you want a proven choice.
Plastic: light and cheap. It won’t rust. It can warp with heat or stain from oils. Good as a budget spare. Avoid thin, bendy plastic for daily use.
Bamboo: warm and quiet in a wooden drawer. Eco-friendly. But it can absorb oils and crack. Treat it like a wood utensil and dry it fast.
Budget vs upgrade
On a budget, buy a sturdy plastic or basic stainless scoop. It will work. If you upgrade, look for:
Example picks: OXO Good Grips 1-Tablespoon (stainless), Hario Coffee Spoon (long handle), JavaPresse Stainless Scoop.
Small extras that matter
Choose rounded bowls without seams—easy to clean. Prefer etched marks so they never fade. If you want speed, choose a 2-tablespoon model for batching.
Buying checklist
Pick one that fits your grind and your life. The right scoop makes the next brew simpler and truer.
Calibrate and Care: Keep Your Spoon True
Fast water calibration
You need one tool: a scale. Use a scale that reads 0.1 g. Fill your spoon as you normally would. Tare a small cup on the scale. Dump the spoon into the cup and note the grams. One gram equals roughly one milliliter of water. Repeat three times and take the average. That is your spoon’s true capacity.

Why do checks matter?
Tools drift. A bend, a dent, or a worn mark changes volume. A rainy week packs grounds denser. Old beans grow oil and stick. You can lose 5–10% of dose without knowing. One test takes one minute. It saves dozens of bad brews.
Humidity and old grounds
Humidity swells grind and packs it. Fresh, dry grounds fluff more. Oily beans cling and compress. If your spoon reads heavier after rain, don’t blame the grinder. Adjust the dose, or switch to weighing by grams until conditions change.
Clean and store right
Wash stainless scoops in warm soapy water. Dry them at once. Don’t soak bamboo. Avoid the hot top rack if the scoop is plastic. Store spoons away from open bean bags. Keep them in a dry drawer or a jar lid. Small care keeps shape and marks true.
When to re-test, re-mark, or replace
Re-test every 3 months or after a drop. Re-mark etched lines when they fade. Replace the scoop if it bends, chips, or the capacity shifts more than 2–3%. A bent spoon will cost you beans and time.
Keep this check simple. Move on to the final notes.
One Spoon, Better Coffee — Your Next Brew
You can make this work. One good spoon gives you steady cups. Use the steps. Pick the right spoon. Match grind and method. Calibrate and care. Taste and tweak. Keep it simple. Dose like a pro. Your coffee will thank you.
Measure with calm. Level the scoop. Note the yield. Adjust by grams or spoons. Watch the time. Trust your tongue. Record what works. Repeat with small changes. Soon you will pull cups that sing. Make your ritual yours daily.
 Previous Post
 Next Post
Short and sweet. Measuring made me less lazy and surprisingly more experimental. Worth the 5-min read.
I laughed at the ‘One-Spoon Promise’ line. 😂 But for real: my IZELOKAY scoop is slightly smaller than advertised. Anyone else notice variance between brands?
Totally — nominal sizes can be misleading. We recommend weighing a full scoop 3 times and taking the average, then noting it on a sticky note on the grinder.
Yep — seen that with Brushed Stainless scoops. That’s why the article’s advice to know your spoon is gold. Measure with your scale once and note the grams per scoop.
This one is more sarcastic: who knew a spoon could solve my life problems? 😂
But seriously: fun read. I did a side-by-side: IZELOKAY vs Brushed Stainless scoop. Different capacities, as the article warned. I now keep a little note on my cabinet with grams/scoop for each brand. Highly recommend if you have multiple scoops lying around.
I do this too! Also color-code them with tape so my partner doesn’t use my espresso scoop for French press 😂
A small label like that is a great low-effort hack — glad you took the ‘know your spoon’ advice to heart.
Not gonna lie, I almost skipped the spoon part because ‘just eyeball it’ is my past life. Now I measure. My morning ritual feels fancy and my coworkers noticed the change. 😅
PS: the ‘Calibrate and Care’ line about rinsing and drying to avoid stains is underrated — oily beans + damp scoop = gross.
Quick question: anyone compared Maestri House USB-C scale with Etekcity? Thinking of buying the Maestri for the timer feature but Etekcity is cheaper. Which is more accurate long-term?
Also consider battery/USB-C charging — Maestri’s convenience can be underrated.
If you do a lot of pours, Maestri’s timer helps with consistency. For occasional users, Etekcity is money-smart.
I have both. Maestri feels more coffee-focused (timer + tare combo) and is slightly faster to zero. Etekcity is fine for general use but lacks the quick-tare ergonomics.
We hear that a lot. Maestri House tends to be preferred by espresso folks for its timer responsiveness. Etekcity is a solid budget option for batch brews.
Last one from me: small PSA — rinse your scoops right away if you use oily dark roasts. I left a Brushed Stainless scoop in the sink overnight and it stained slightly. Not a dealbreaker, but care matters. Article’s cleaning tips are right on.
Yep — immediate rinse and dry prevents oil buildup and keeps calibration consistent. Thanks for the heads-up!
Nice piece — loved the practical steps in ‘How to Use Your Measuring Spoon’. I switched to the Flezoo long-handle scoops last month and they actually fit my Aeropress better than the old 2-tablespoon scoop. Also synced it with the Maestri House USB-C scale for tamp timing. Coffee’s more consistent now. 👍
That’s solid — didn’t think about warming the scoop. Will try with my morning roast!
Great to hear, Sarah! The long-handles do help with deeper devices. Glad the article helped you match tools to method.
I have the same Flezoo pack — big fan. Pro tip: warm the scoop with hot water if you’re doing oily beans, keeps them from sticking.
Okay, nerdy comment incoming — I actually calibrated my kitchen scales (Etekcity) after reading the ‘Calibrate and Care’ bit.
First I used a known 50g calibration weight, then checked the BAGAIL BASICS and my Etekcity side-by-side. The readings were off by ~0.8g on the Etekcity, so I adjusted my expectation when using that 2-tablespoon scoop.
Also, the article’s tip about measuring by volume vs weight saved my tastebuds — espresso was a disaster until I switched to weight-based dosing with the Maestri House scale. Thank you!
(Yes, I am that person who brings a tiny calibration kit to friends’ houses. 🤓)
Totally a hobbyist thing — but if you care about consistency more than ‘close enough’, then yes. Otherwise a cheap scale like BAGAIL is fine for daily use.
Love the detailed rundown, Olivia — exactly the kind of practical calibration story we hoped readers would try. Tiny kit = dedication lol.
Good point, James. Calibration is one part of a chain: grind, dose, water temp, and extraction all matter.
Heh, I’m tempted to buy calibration weights now. You think it’s worth it for a hobbyist?
Also remember temp and humidity affect beans — calibration helps but doesn’t fix everything.
Long post: I tried to follow ‘Match the Spoon to Your Grind and Method’ step-by-step for my Chemex.
1) Used the Brushed Stainless 2-Tablespoon Coffee Scoop — felt clunky.
2) Switched to a narrower scoop (Flezoo) that fits better when pouring.
3) Paired with BAGAIL BASICS scale for accuracy.
Result: fewer channeling issues and sweeter cup. One weird thing — tamping measures for filter coffee? lol. The article’s method list helped me rethink the process though. Thanks! ☕️
Great experimental approach, Emma. Tamping is mostly for espresso but we like that you applied the thinking to filter — technique adaptation is how new tricks are born.
Another quick practical tip: if you’re buying online, check user photos. Several Amazon listings (Brushed Stainless, IZELOKAY, Flezoo) show real-world scale comparisons. Saved me from buying tiny scoops. Also — keep an eye on the BAGAIL BASICS and Maestri reviews for drift complaints.
Excellent tip, James. User photos are often the best reality check for size and finish.
User pics = the truth. Listings can be deceptive with angles.
Agreed — and watch out for seller bundles that mix different brands but call them ‘set of identical scoops’ lol.
Constructive bit: the ‘Buy Smart’ section could use more on durability vs price. I bought a cheap 2-tablespoon scoop that warped after a month. If the article had a tiny chart showing materials (stainless vs plated vs plastic) and pros/cons, that would’ve been nice. Otherwise, solid guide.
Noted — we’ll include a durability checklist in the next update.
And if you’re clumsy like me, long handles (Flezoo) keep your fingers away from hot water. Practicality > aesthetics imo.
Totally agree. Bought a plated scoop once — looked nice but nope, bent after crumbs. Invest in stainless steel (Brushed or IZELOKAY) if you want longevity.
Haha same, Mason. Function wins.
Thanks, James — good suggestion. We tried to cover material hints but a quick comparison table is a great idea for a follow-up.
Also check for welds — one-piece scoops are sturdier than glued handles.