Step-by-Step Guide to Set Up Your Beverage Warmer
Warm Drinks, Fast
You want warm drinks. This guide shows you how to set up your beverage warmer fast. You will plug it in, test heat, and keep your drink steady. Simple steps. No fuss. Start now today.
What You Need

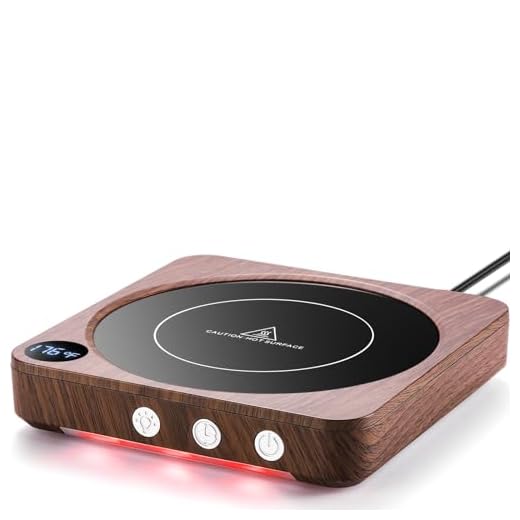
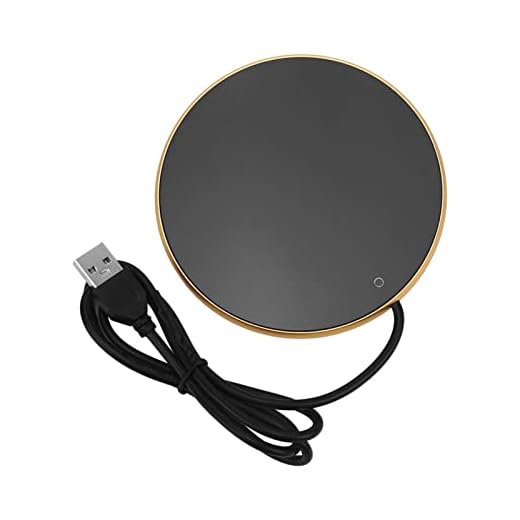
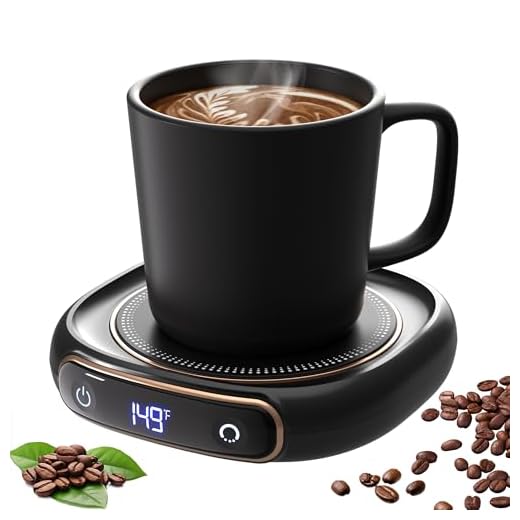
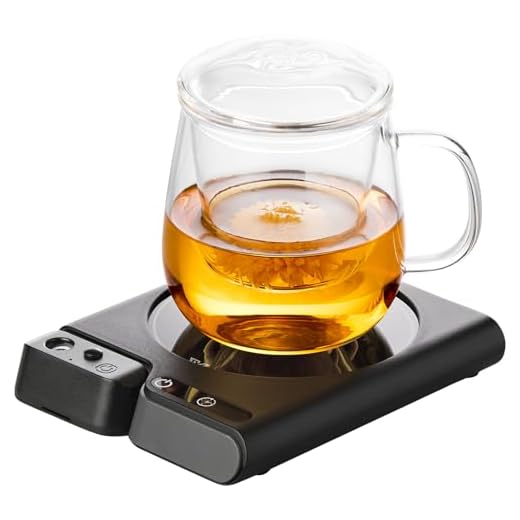
Top Coffee Cup Warmers for A Cozy, Hot Sip
Unpack and Inspect the Warmer
Got a dud? Catch defects before you burn a mug.Open the box. Place parts on a clean table. Find the warmer base, the power cord, and any inserts.
Check the cord for cuts. Scan the base for loose seams or cracks. If you see damage, stop and contact the seller. Keep the receipt.
Read the quick guide. Remove any packing film from metal surfaces. Wash removable inserts with warm, soapy water. Dry them well.
Wipe the base with a soft cloth. Do not submerge the base. Set the base on a flat, stable surface. Clear flammable items and stay away from edges.
Inspect the heating pad for stains or odd smells. Check the switch. Plug in the unit briefly and watch for sparks. Unplug after the test. If all is good, move to setup.
Pick Placement and Power
One spot keeps drinks hotter and safer — where will you place it?Pick the place where the warmer will live. Use a flat, sturdy table like a kitchen island or nightstand.
Check the outlet for wobble and call an electrician if unsure. Make this your habit. Set the cup in the same spot each time. Test once a day. Watch the unit warm your mug.

Initial Power On and Heat Test
Does it reach temps that matter? One quick test tells you.Place an empty cup or a cup of water on the pad.
Set the unit to Low first.
Plug it in.
Turn it on.
Listen for odd sounds. Smell for any strange odor. Let it run for five minutes.
Touch the cup base after five minutes. It should feel warm, not scalding. Use an infrared or kitchen thermometer for a number. Aim for under 60°C (140°F) at the mug surface.
Check power and cup type if the cup stays cold. Thick ceramic may need more time. If the unit gets too hot or cycles on and off, unplug it. Contact support. Do not use a damaged unit. Safety first. Make notes on your first runs today.
Set Temperature and Daily Habits
Keep coffee hot and no one blows on it — little tricks that work.Learn the controls. Most warmers use a dial or two buttons. Choose Low to keep your drink sipable. Choose High to warm fast but risk losing aroma. Start Low. Raise only if the cup stays cold. Use a lid to hold heat. Stir your drink to even the temperature. Do not run the warmer empty. Turn it off when you finish.
Maintenance and Troubleshooting
Small fixes save you money — simple checks to extend life.Unplug first. Clean spills after each mess. Wipe the pad and base with a damp cloth. Remove rings of film with mild soap. Dry fully before you plug in.
Check the cord for fray every few weeks. Stop using the unit if it trips the breaker. Try another outlet. Contact a pro if it still trips. Replace worn or frayed cords. Replace seals or pads if they fail.
Keep the manual. Register your product for warranty. Store spare parts if you have them. Treat the unit with care. Make checks part of your week. Imagine your latte drips; wipe and dry at once. Replace a cracked cord before you plug the warmer.
Enjoy Your Warm Drink
You set it up. You tested it. Keep habits. Clean it. Use safe plugs and spots. Small care keeps it working for years. Try it. Share results.
Super helpful guide. One tiny suggestion: show a photo or diagram of recommended clearance distances in Step 2. I wasn’t sure how far from a backsplash to place it.
Thanks Priya — good idea. We’ll add a simple diagram showing at least 2–3 inches clearance from vertical surfaces and no flammable materials nearby.
Followed Step 1 and 3 exactly. During initial power on, the unit hummed for like 10 seconds then was normal. Is that expected? Also, the troubleshooting guide mentions a ‘reset’ — how do you do that exactly?
One more tip: ensure the unit is on a level surface. Uneven placement can sometimes cause extra vibration noise.
Had the same hum on day one — it stopped after a few uses. If it persists though, don’t ignore it.
A brief hum on first power can be normal as internal components warm up. If it continues or gets louder, unplug and contact support. For reset: unplug for 60 seconds, press and hold the power button (if present) for 5 seconds, then plug back in.
Tried this last week. Setup was a breeze but FYI — if your cup has a really wide base it might not sit perfectly centered. Not a dealbreaker, but it affects even warming.
Also: be careful with mugs that have plastic handles; they can get oddly warm near the base.
Overall: 4/5, would recommend to coworkers. 👍
Good points, Noah. Wider mugs can have uneven contact — smaller, flat-bottom mugs work best. And yes, avoid thin plastic handles if you need to handle the cup immediately.
If your mug won’t sit flat, try a slightly smaller saucer under it — weird hack but it stabilizes the base.
I put a small silicone coaster on the warmer and it helped center some of my fancier mugs. Saved several mornings of wobbly cups.
Thanks for the hacks — I’ll compile a list of common mug fixes for the guide update.
I like the ‘Daily Habits’ section. Simple routines make a big difference — I unplug after dinner and wipe down weekly.
Question: Is it ok to leave a cup on overnight if the warmer is turned off? I sometimes forget to take my mug to the sink.
I leave mugs overnight sometimes (guilty). Rinse in the morning — no big deal unless you have milk residue sitting there.
If the warmer is off, leaving a mug overnight is fine from a device-safety standpoint. From cleanliness — best to rinse or wash the mug to avoid lingering odors or stains.
Good guide. A couple of additions I hoped to see:
– How often should the warmer be unplugged if unused daily?
– Any recommended cleaner for the surface that won’t ruin the finish?
Not complaining, just would like more maintenance detail.
I use a tiny amount of white vinegar diluted with water for stubborn stains — gentle and it removes mineral marks. Test a corner first!
Great suggestions, Olivia. We usually recommend unplugging if you won’t use it for 24+ hours. For cleaning, a damp microfiber cloth with mild dish soap works well; avoid abrasive pads.
Love this guide — super clear and easy to follow.
I had a weird squeak when I first plugged mine in; turned out a small plastic bit was rubbing the base. Steps 1 and 3 saved me though.
One question: the temp dial shows 120–140°F — is that warm enough for green tea? I’m paranoid about overheating.
Also, tip: put a coaster under the warmer if your table is cheap wood. Learned the hard way. 😅
P.S. the ‘Enjoy Your Warm Drink’ ending made me lol.
Haha that ‘learned the hard way’ line is me. I used a wooden tray as a test and it left a faint ring for weeks. Coaster forever now.
Yup – green tea at too high temp tastes bitter. I keep mine around 130°F and it’s perfect. Also, a silicone mat under the warmer saved my desk from heat marks.
Thanks for the note, Sarah — great catch on the squeak. For green tea, 120–140°F is fine (green tea prefers lower temps), but if you like it hotter, try the upper range briefly. And yes, coasters are underrated.
Quick and to the point. Setup took 3 minutes. One nit: the placement section should mention avoiding direct sun — my cup warmed up extra fast sitting by a sunny window.
Okay so I set mine up exactly like the guide said. Step 3 heat test? Yep, my cat decided it was his new nap spot. He stared at me like, ‘You made this for me, right?’
Pros: coffee stays warm. Cons: cat thinks it’s a throne. 😂
Also, the troubleshooting section helped when the LED flickered — reseated the plug and all good.
This made me laugh out loud. My cat tail-whips any mug I place anywhere. Warmers are basically cat magnets.
Pro tip: put a little blanket over the spot you don’t want the cat to sit on. Works… sometimes.
Glad the troubleshooting helped — and lol on the cat throne. Pets always find the warmest things. If the LED flickers again, try a different outlet to rule out power issues.
Also, if pets sit on it regularly, check vents (if any) and clean them occasionally to avoid hair buildup.
Same here, my dog plopped next to mine once. Pets + warm surfaces = instant attention. Keep an eye on them though!