What Your Grounds Hide
What Your Grounds Hide
You cup the grounds. You think you know them. They hide more than aroma. They hold origin, roast, grind, age, and flaws. You will learn to read them.
This piece will show you the bean behind the ground. It will reveal what roast level conceals and what it shows. It will expose the quiet crime of poor grinding. It will teach you to spot freshness, oxidation, and hidden staleness. It will warn you of flaws, contaminants, and unseen dangers. Finally, it will teach you to read, diagnose, and rescue your brew. You will waste less. You will brew better soon.


Unlocking Coffee: The Science Behind Its Flavor
The Bean Behind the Ground
Read the scent
You start with smell. Sniff dry first. Then wet the grounds and sniff again. Dry scent gives you roast and processing. Wet scent shows origin and varietal notes.
Light, floral smells often mean East Africa. Think jasmine and bergamot. Heavy cocoa or toast points to Brazil or Central America.
See the texture and oil
Look at the surface. Matte and dusty means lighter roast or a washed process. Shiny and slick means dark roast or oily naturals. Feel a pinch. Gritty tells you uneven grind or old beans. Smooth tells you good roast and fresh beans.
Match clues to origin and process
Use a few anchor clues. They are reliable.
These are rules of thumb. They fail when roast or poor grind hides the bean.
Quick how-to: read a sample
- Smell dry for 5 seconds. Note the first three words that come to mind.
- Pour hot water, steep 30 seconds, sniff again. Look for change.
- Pinch a little. Inspect under light for shiny particles or husk.
- Compare to a known bean. Try an Ethiopian and a Brazilian back-to-back.
Tips: Use a Baratza Encore for a reliable grind. Use a pour-over like the Hario V60 to hear the bloom. These tools make the clues clearer.
You will get faster. You will miss fewer telltale signs.
What Roast Level Conceals and Reveals
Roast cooks the bean
Roast is heat. It turns green bean chemistry into cup notes. Sugars brown. Acids fall apart. Proteins break. Dark heat wipes clean some origin clues. Light heat keeps fruit and acid alive. You learn which came from the roaster and which came from the farm.
Read roast on the grounds
Look at the color. Pale tan means light. Deep brown means darker. Touch the grounds. A slick sheen means oils pushed out by a long roast. Smell them. Smoke, toast, caramel—those are roast notes. Bright citrus, florals, or berry hints point back to the bean.
Flavors from roast vs flavors from bean
If you taste chocolate and also bright lemon, both can exist. But if only smoke and burned sugar show, roast is winning.
How to tell in the cup
Brew a small cup. Use two grinds: one coarse, one fine. If finer grind raises bitterness and roast notes, the roast is strong. If lighter extraction brings forward fruit and acidity, the bean is present. Try a lighter roast of the same origin—home roasters like a Behmor 1600 make this possible. Compare and decide what you want in a cup.
This matters. Roast can cover faults or make a bean taste one-note. Next you will see how grinding can hide or reveal these roast clues.
The Quiet Crime of Poor Grinding
Grinding hides the truth. Size and shape decide what the water can pull from the bean. Coarse bits stay sour. Fine dust goes bitter. A mix of the two gives you both in one cup.
Fines and boulders
Fines are the powder. They over-extract fast. They taste harsh and bitter. Boulders are the big chunks. They sit under-extracted. They taste thin and sharp. When you have both, your cup fights itself.
Look at your grounds on a white plate. Rub them between your fingers. See specks and clumps. If you do, your grinder is lying to you. A small home sieve or a simple visual check will tell you a lot.
Signs in the cup:
Grinder matters. Fast fixes.
A blade grinder makes chaos. Burrs make order. If you grind daily, get a burr. The Baratza Encore, Sette 270, Timemore Chestnut, or a Hario hand mill all beat blades. For a good balance of price and consistency try a conical burr.
Quick tweaks you can do now:
Match grind to brew:
When you change beans or roast, re-check your grind. A small twist of the knob will fix many crimes. Keep your grinder clean. Old crumbs hide and make things worse.
Freshness, Oxidation, and Hidden Staleness
How stale smells and tastes show up
You pull a bag from the shelf. The scent is flat. No brightness. No fruit. You brew. The cup tastes thin. Cardboard moves in. Oils smell waxy or like old nuts. That is oxidation. It steals scent and body. It does not always shout. It creeps. You learn to spot it.
Sniff and sip checks
Smell the grounds on your hand. If the aroma is weak, the coffee will be weak. Look for:
Do a bloom test. Dose a small filter. Pour twice the weight of water. Watch the bubbles. A thin, slow bloom hints at stale beans.
Simple storage rules
Keep air out. Keep light out. Keep heat and humidity out. Grind just before brew when you can. Buy whole beans and dose small.

Do not refrigerate daily stash. Fridge adds moisture and smells. Freeze only for long-term. Freeze in small, sealed bags. Thaw fully before opening the bag.
How long different grinds hold
These are practical windows. Variables change things. Use your nose.
If the brew smells dull or tastes papery, do not try to fix it. Compost the grounds. Buy fresh. Brew better.
Flaws, Contaminants, and Unseen Dangers
Look and pick
You can learn a lot by eye. Spread a scoop on white paper. Look for odd colors. Look for fuzz. Look for shiny bits. Pick out stones, shells, and hard husks. Use a loupe if you have one. The Carson MicroBrite 60x gives a clear view in a small cost and fits your pocket.
Smell and taste cues
Sniff the dry grounds close to your nose. Musty or cellar odors hint at mold. Chemical smells — paint, fuel, plastic — mean contamination. A few stale beans will taste flat. A strange bite or metallic note is a red flag. If it smells wrong, do not brew.
When to toss and when to save
Toss immediately if you find:
You can salvage a bag if you find:
If you are unsure, err on the side of safety. Mold can make you sick. Chemicals can be dangerous.
Quick checks and tools
Prevent the problem
Store beans dry and dark. Clean your grinder often. Buy from trusted roasters. Small batches cut risk. Seal bags after each use. Replace torn packaging.
These steps keep your cup clean. They keep you safe.
Read, Diagnose, and Rescue Your Brew
Read the signs
Taste your coffee cold. Sour sting shows up fast. Bitter lingers. Flat feels dull. Look at the puck or filter. Dry, powdery grounds hint at over-extraction. Wet, sticky grounds point to under-extraction. Read these cues like a map. They tell you where to go next.
Stepwise diagnosis
Start small. Change one thing at a time.
Fixes you can do in minutes
Try these quick fixes and taste after each change.

Rescue and reuse grounds
Don’t waste spent grounds. They still have use.
Taste, tweak, repeat. You will get faster. You will waste less. From there, move on to the final look and habits that keep your cups true.
Look, Learn, Brew Better
Your grounds are a report. Read them. Test them. Change one thing at a time. Smell. Look. Taste. Use short checks and small fixes. You waste less. Your cup gets better.
Keep it simple. Trust your senses. Try one tweak this week. Then brew again and learn. Share what you find. Teach a friend. Save beans. Drink well. Enjoy more.
 Previous Post
 Next Post
The “quiet crime of poor grinding” — lol yeah guilty. My grinder was basically committing misdemeanors against my espresso. 😂
Ha — glad the phrasing resonated. If you want to stop the misdemeanor, try dialing in with a calendar: change settings weekly for a few brews to see trends.
Misdemeanor today, felony tomorrow if you ignore the burrs. Clean those bad boys!
This article makes me paranoid about contaminants. The Flaws, Contaminants, and Unseen Dangers section was unnerving — do suppliers actually send beans with foreign objects? I’m thinking about using the Barista Hustle bowls for visual inspection and the Veken 16oz canister for smaller stash. Also, who inspects the big 2.2 lb bags like Lavazza Super Crema? 🤨
Good question — while it’s uncommon, contaminants can show up, especially in bulk or poorly processed batches. Visual inspect, smell, and tumble beans in a shallow bowl — objects usually reveal themselves. For large bags like Lavazza, inspect while transferring to canisters and give a quick sniff.
I always dump a new bag into a tray and sort through fast. Been doing it for years after a single bad experience — never going back.
Same — found a twig once in a cheap bulk bag. File a complaint and keep receipts.
If you’re really worried, use a mesh sieve to separate out oversized debris before grinding. Works surprisingly well.
Also, report any serious foreign object to the seller. It’s rare but they should know.
Shoutout to the Read, Diagnose, and Rescue Your Brew section — saved my Saturday. I had a weird metallic aftertaste that cupping and then swapping grinders helped pinpoint to a damaged burr. Replacing with an OXO fixed it.
Also, the World Coffee Gift Box made for a fun blind tasting with my roommate. We guessed origins wrong and learned a lot lol.
Nice troubleshooting flow, Derek. Swapping equipment is one of the fastest ways to isolate the problem. Glad the gift box doubled as a learning tool!
Metallic taste — definitely check grinder internals and also water source. Hard water can add off flavors sometimes.
Roommate blind tastings are the best — forced training for the palate. Keep it fun.
Damaged burrs = expensive lesson but worth it. Buy spares if you can.
Loved the rundown on ‘What Roast Level Conceals and Reveals’.
I’ve been doing home cuppings with the Barista Hustle 200ml Stackable Cupping Bowls Set and it’s made detecting subtle oxidation flavors way easier. The Amazon Fresh Colombia 32oz whole bean I got lately had a faint papery note — cupping made it blatant.
Also wanted to say: the World Coffee Gift Box is a great intro pack for friends who think ‘all coffee is coffee’. Seriously, that sampler can expose people fast 😉
Cupping bowls make a difference. Tip: use same water temp and pour time for each sample to reduce variables.
Fun observation about Samplers — also handy for diagnosing whether flavor is bean-specific vs roast-level.
I gifted the World Coffee Gift Box and it was a hit. People actually asked follow-up questions about origins and roast — mission accomplished!
Appreciate the detail, Laura — cupping is the fastest way to train the palate. If you want, I can post a short cupping checklist based on the bowls you mentioned.
Not thrilled — bought Amazon Fresh Colombia and it tasted kind of stale. Maybe bad batch? Article helped me check for oxidation but still kinda bummed. Anyone else had inconsistent shipments from Amazon?
Sorry you had a bad bag, Nate. It happens. Check roast date and seller, and request a return or replacement. If you want, share the roast date and we can help diagnose whether it’s age or storage.
Yep, I’ve gotten inconsistent freshness from larger retailers. Try to buy from roasters with clear roast dates.
Beans hide everything — unburnt sins and little secrets. Bought Lavazza Super Crema as a cheap pick-me-up and it covers a lot, but when I want nuance, the Amazon Fresh Colombia does better. The trick is matching grinder and roast, and not overcomplicating it.
Don’t sleep on dialing in for seasonality too — beans from the same origin can vary between harvests.
Well put — matching grind to roast is the core. Lavazza is forgiving; lighter origins reward precision.
This! Lavazza is a reliable daily driver; single-origins like Colombia shine when brewed carefully.
Good article overall. The ‘Look, Learn, Brew Better’ section is a solid reminder that tools help, but observation is everything. I use a mix: Lavazza Super Crema for quick mornings, a sampler from the World Coffee Gift Box when I have time to taste, and an OXO grinder for consistency.
Minor constructive note: wish there were more pictures of contaminants and examples of problem grounds — visual examples would speed up learning for newbies.
I’d second the video. Watching someone cup and explain helps connect words to practice.
Thanks, Hannah — that’s fair. Adding photos of common contaminants and sample grounds is on the to-do list for the next update.
Agree on pictures. When I first learned, a visual reference would have prevented panic over normal chaff vs actual foreign objects.
Maybe a short video demo would help too — seeing the grind distribution and contaminated beans in motion is clarifying.
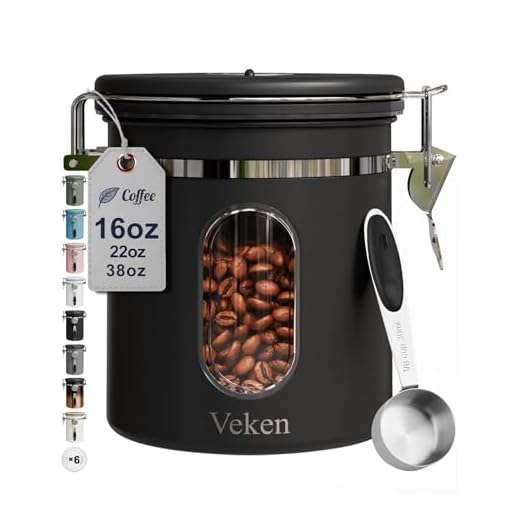
Quick storage tip from someone who learned the hard way: buy canisters that match how much coffee you consume. The Veken Airtight 22oz is perfect for my weekly beans, while the 16oz is great for single-origin experiments. Keeps oxidation low and flavors more consistent.
Also, vacuum lids are not magic — rotate stock and use older beans for cold brew or blends.
Excellent practical advice, Angela. Rotating stock is the true MVP here. Using older beans for cold brew is a brilliant reuse tactic.
If space allows, freeze bulk unopened bags and only open what you’ll use in a week. Helps with larger purchases like 2.2 lb Lavazza.
Yep — vacuum + rotation = best combo. I keep only two sealed canisters open at a time.
Long post incoming — for anyone wanting a quick diagnostic routine:
1) Smell the beans straight from the bag (oxidation/paper notes?).
2) Cup with Barista Hustle bowls if possible — note acidity, body, and finish.
3) Try two grind settings on OXO or similar and brew both.
4) If flavors persist, try a different origin (Amazon Fresh Colombia vs Lavazza Super Crema) to see if it’s roast vs bean.
5) Store leftovers in Veken canisters and label date opened.
This systematic approach helped me reduce false starts and buy fewer tools I didn’t need.
Fantastic step-by-step, Priya. Readers will appreciate an actionable routine. If you’re comfortable, would you mind if we distilled this into a quick checklist in the article?
Love number 4 — swapping origin is a quick A/B test. Also, document brew times and temps so you can reproduce results.
A few practical experiments for folks who want to ‘read’ their grounds:
– Grind a tiny sample and smell it. If it smells papery or flat, try fresher beans.
– Brew the same bean at two roast-related temps: lower for light roasts, slightly hotter for darker ones.
– Use the Barista Hustle cupping bowls to spot suspended fines and uneven extraction.
Also, lol at the ‘quiet crime’ phrase. It really is criminal when you’re chasing clarity and the grind is sabotaging you. 😅
Also, use that o ring on your grinder’s chamber properly — fines can clump if the seal is compromised.
If you want to get precise, a refractometer helps quantify extraction, but for everyday use these sensory checks suffice.
The two-temp idea is worth trying. I noticed my Colombian got brighter at slightly lower temp.
sabotaging grind — new band name. 😂
Great micro-experiments, Maya. The smell test is underrated and fast. Thanks for the humor — keeps things relatable.
Great piece — that section on the quiet crime of poor grinding hit home. I was using the OXO Brew Conical Burr Grinder for months on an inconsistent setting and couldn’t figure out why my espresso tasted flat. Switched grind size and used a Veken Airtight 22oz canister and wow, night and day.
Two small notes: check burr alignment and clean the hopper regularly. Also, the article’s tip about checking for contaminants (tiny rocks, chaff) saved me from a ruined portafilter.
Thanks for sharing, Ethan — glad the grinder and canister combo helped. Burr alignment and hopper cleaning are underappreciated steps. If you want, mention your grind setting and brew method and we can troubleshoot further.
Agreed. One extra tip: weigh both beans and yield when you adjust grind. Removing guesswork helps isolate whether flavor issues are grind or freshness related.
Totally — I had the same experience with OXO. Also, if you roast dark like Lavazza Super Crema, you might need slightly coarser grind than lighter Columbia beans.