How to create latte art with specialty coffee?
This guide provides a step-by-step approach to creating stunning latte art with specialty coffee. It emphasizes the significance of using high-quality ingredients, such as fresh espresso and properly steamed milk, to achieve the best results. By following the outlined techniques, from the proper milk frothing methods to pouring styles, you’ll learn how to transform a simple cup of coffee into an artistic masterpiece, impressing both yourself and your guests.


How to Create Rosetta Latte Art: A Step-by-Step Tutorial
Gather Your Ingredients and Tools
Gather the necessary ingredients by starting with specialty coffee beans. Look for fresh, high-quality beans that are roasted within the last few weeks. You might consider single-origin beans from regions like Ethiopia or Colombia for a distinct flavor profile. Next, select fresh milk, choosing whole or 2% for the creamiest texture in your drink. Brands that emphasize local sourcing or organic practices often provide the best taste, so keep an eye out for those options.
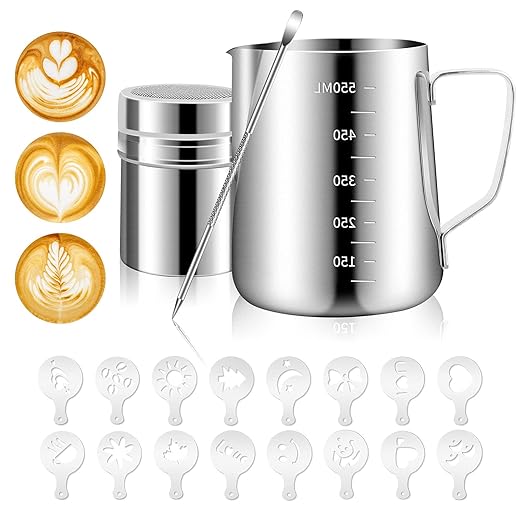
Collect your tools by ensuring you have a reliable coffee grinder. A burr grinder is ideal, as it provides a consistent grind size, which is crucial for espresso preparation. Set up your espresso machine, making sure it’s clean and ready to use. Grab a steaming pitcher for frothing your milk, and don’t forget to choose a cup that enhances your coffee experience. A porcelain or ceramic cup works well to retain heat. Gather everything at your workspace, and you’ll be all set to create delicious coffee drinks!


Brew Your Espresso
Grind the specialty coffee beans using your coffee grinder, ensuring a fine consistency that resembles table salt. Measure out approximately 18-20 grams of coffee beans for a double shot of espresso. If you’re unsure about the right amount, use a scale for precision. Adjust the grind size if your first attempt doesn’t yield the desired flavor. A finer grind will help extract more oils and flavors, creating a richer shot. Aim for a smooth and even texture in your grounds, which will facilitate optimal extraction during brewing.
Brew the espresso using your espresso machine. Place the portafilter on a stable surface and fill it with the freshly ground coffee, distributing it evenly. Tamp down firmly and evenly to create a level surface, which is crucial for an even extraction. Lock the portafilter into the machine and start the brewing process. Keep an eye on the extraction time—ideally, it should take about 25-30 seconds for a double shot. Look for a rich, creamy shot with a beautiful layer of crema on top. If the crema is thin or if the extraction is too fast, adjust your grind size or tamping pressure for the next brew.
Steam the Milk
Pour fresh milk into the steaming pitcher, filling it about one-third full. Choose whole milk for a creamier texture or skim milk for a lighter option. Activate the steam wand and submerge it just below the surface of the milk. This position is crucial; if the wand is too deep, it won’t create the desired foam, and if it’s too shallow, you’ll end up splattering milk everywhere. As you start steaming, listen for a gentle hissing sound—this indicates that the steam is effectively incorporating air into the milk.
Gradually lower the pitcher to create a whirlpool effect. This movement helps to evenly heat the milk and integrates the air for a smooth microfoam. Aim for a temperature of about 150-155°F (65-68°C); use a thermometer for accuracy or feel the pitcher with your hand—when it’s too hot to touch, you’re in the right range. Keep an eye on the texture; you want it to be velvety and glossy, not stiff. Once you achieve that perfect microfoam, you’re ready to pour and create beautiful latte art or enjoy a rich cappuccino.
Combine Espresso and Milk
Pour the brewed espresso into your coffee cup, ensuring that it fills about one-third of the cup. This base layer will serve as a rich foundation for your drink, delivering that bold coffee flavor you love. Next, take the steamed milk and prepare for the pour. Tilt the cup slightly to create an angle that will help the milk mix seamlessly with the espresso as you pour.
Begin pouring the steamed milk slowly into the center of the espresso. This gentle approach allows the microfoam to rise to the surface, creating a beautiful layered effect. Maintain a steady hand and adjust the angle of the cup as you pour, ensuring that the milk flows smoothly without splashing. As the foam begins to accumulate on top, focus on creating a creamy texture that enhances the overall experience of your drink.
Create Your Design
Adjust the angle and height of the pitcher as you pour the milk. Lean the pitcher closer to the cup to create a steady stream, which helps you control the flow of milk better. If you’re aiming for a thicker layer of foam, raise the pitcher slightly higher to allow the milk to fall more gently. This technique is especially useful when you want to create a base for your design. For simple shapes, such as a heart or a rosette, start with a steady circular motion. Picture drawing a circle with the stream of milk; this will form the foundation of your design.
Finish your shapes with a quick flick of the wrist. For a heart, pour a small amount of milk at the top and then gently pull down while moving the pitcher back to create the point of the heart. For a rosette, keep the pitcher steady, pour in spirals, and then pull away with a swift motion to create the petal effect. Remember, practice makes perfect! Try these shapes multiple times and adjust your pouring angle and height as needed. Over time, you’ll develop the muscle memory to create beautiful designs effortlessly.
Mastering the Art of Coffee
In conclusion, mastering latte art is a rewarding journey that combines your passion for specialty coffee with creativity. With practice and the right techniques, you can elevate your coffee-making skills and impress your friends with beautiful designs. Remember to enjoy the process, experiment with various patterns, and most importantly, savor each cup you create. Happy brewing!
Essential Supplies Needed


Mastering the Pour
Mastering the Art of Brewing: Techniques for Perfecting Your Specialty Coffee Experience
- Start with Quality Beans: Choose freshly roasted specialty coffee beans from a reputable source. Look for unique flavors and origins that intrigue you, and consider asking for recommendations at your local coffee shop
- Invest in Proper Equipment: While you don’t need to go overboard, having a good grinder and a brewing method that suits your taste (like a pour-over, French press, or AeroPress) can enhance your coffee experience significantly
- Master the Grind Size: Experiment with different grind sizes based on your brewing method. For example, a coarse grind works well for French press, while a fine grind is better for espresso. This can dramatically affect the flavor of your coffee
- Pay Attention to Water Quality: Use filtered water if possible, as it can greatly impact the taste of your coffee. Aim for water that’s around 200°F (just off boiling) for optimal extraction
- Take Notes and Experiment: Keep track of the beans, grind size, water temperature, and brew time you use. Try varying these factors to discover what you enjoy the most. Specialty coffee is all about exploration, so don’t hesitate to experiment!
- Enjoy your journey into the world of specialty coffee!
Understanding Specialty Coffee: Your Questions Answered
The processing method of coffee—washed, natural, or honey—plays a significant role in determining the flavor profile, acidity, and overall quality of specialty coffee. Here’s how each method impacts your cup:
- Washed (or Wet) Processing: In this method, the coffee cherries are pulped to remove the outer fruit layer, and the beans are fermented to remove the mucilage before being dried. This leads to a cleaner cup with bright acidity and pronounced flavors. You might notice floral or citrus notes, making it a favorite for those who appreciate clarity in their coffee.
- Natural (or Dry) Processing: With natural processing, the whole cherries are laid out to dry in the sun, allowing the fruit to ferment around the beans. This method often results in a fruity and wine-like flavor profile, with lower acidity. You might encounter flavors like berry or chocolate, giving the coffee a fuller body. It’s great for those who enjoy a bolder and more complex taste.
- Honey Processing: This method is a hybrid between washed and natural. The cherries are pulped, but some of the mucilage is left on the beans during drying. This results in a sweet, syrupy quality with a medium body and balanced acidity. You can expect flavors that are both fruity and sweet, often with a hint of caramel or toffee.
Ultimately, the choice of processing method can elevate your coffee experience, allowing you to explore a wide range of flavors and aromas. Each method brings out unique characteristics, so experimenting with different types can be a delightful journey for your palate!
 Previous Post
 Next Post
I love this guide, but I have my own twist! Instead of regular milk, I use oat milk because it froths so nicely. Has anyone else tried alternatives like almond or soy? I find they have different frothing abilities and can impact the design.
Great point! Oat milk really does create a nice microfoam. Almond and soy milk can be a bit trickier, but they’re still great options! It’s all about finding what works best for your taste and frothing technique.
This guide is fantastic! I tried making a heart design on my latte using Lavazza espresso and it turned out pretty well. It’s a great way to impress friends at brunch. I really appreciate the step-by-step breakdown! Anyone else tried using different espresso beans? What did you think of the flavor?
This guide is super helpful! But I have to ask, how do you keep your milk from getting too hot? I always seem to overheat it, and it ruins the microfoam. Any tips on keeping it at the right temperature?
Keeping the milk at the right temperature can be tricky! A good rule of thumb is to aim for around 150°F (65°C). You can use a thermometer, or touch the pitcher; it should be warm but not too hot to touch. Practice your timing while steaming, and you’ll get it down!
Such a helpful guide! I’d love to learn more about advanced latte art techniques, like how to create rosettas or tulips. Any tips on how to get those intricate designs just right?
Absolutely! For more intricate designs, it really comes down to pouring technique and practice. Try using a smaller spouted pitcher for better control, and focus on the angle of your pour. Practice makes perfect!
Thanks for your feedback! Lavazza is a solid choice for espresso. Different beans can definitely change the flavor profile of your latte, so experimenting is key! Let us know what beans you try next!
Just wanted to share that I use a Breville Bambino Plus for my espresso, and I love it! It heats up super fast, which is perfect for when I’m in a hurry. Anyone have thoughts on other machines that might offer similar quick performance?
Great choice with the Breville Bambino Plus! It’s known for its fast heat-up time. If you’re looking for alternatives, the Rancilio Silvia is also quite popular for home espresso. Just keep in mind it might take a bit longer to heat!