Find Your Machine — Hands-on Lab & Benchmarks for Semi, Fully, and Super‑Automatic Espresso
Find Your Machine: Pick a Path
You want great espresso. You want a machine that fits your hands and your time. This guide shows three clear paths: SEMI, FULLY, and SUPER‑automatic. It shows how we test machines. It shows simple lab tests and meaningful benchmarks. It helps you choose and act.
You will build a hands‑on lab. You will run easy tests. You will learn the metrics that matter. Then we dive deep: semi‑automatic tuning and results. We test full automatics for push‑button ease and tradeoffs. We check super‑automatics for true bean‑to‑cup reality. Read, test, and pick the machine that fits your life. We give clear scores, photos, and real tips to help you buy with confidence and speed.


Fully Automatic vs Superautomatic Espresso Machines: What’s the Difference?
Understand the Three Paths: Semi, Fully, and Super‑Automatic
The short map
A semi‑automatic hands you the portafilter. You grind, dose, tamp, and time the shot. You control extraction and milk by feel. Think Rancilio Silvia or Gaggia Classic Pro. You learn the craft. You tune for flavor.
A fully‑automatic takes over dose and shot length. You still grind and tamp on some models, or adjust pre‑sets on others. It cuts guesswork, but it asks for tuning. Examples sit between the Barista Express family and pro home machines like the Breville Oracle line. You get speed with room to tinker.
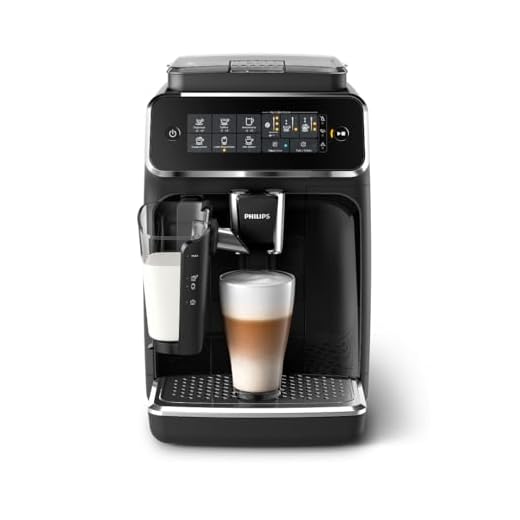
A super‑automatic grinds, tamps, brews, and often steams milk for you. It is push‑button easy. Jura E‑series and Philips 3200 LatteGo are in this class. You trade hands‑on control for speed and consistency. You also accept invisible compromises: grinder heat, fixed tamp, and limited micro‑adjustment.
How to pick, fast
Practical checks and quick tests you can run today
Real talk
If you love tuning, you’ll tweak until the shot sings. If you want one button and reliable crema before work, a super‑auto will be kinder. If you want speed and some control, a fully‑automatic hits the sweet spot.
Build Your Hands‑On Lab: Simple Tests You Can Run
Set the bench
Clear a small table. Wipe it. Lay a towel. Gather tools. Keep it tidy.
Bring: an accurate scale (Acaia Pearl or Hario), a timer, a grinder with known steps (Baratza Sette 270, Niche Zero, or Breville Smart Grinder Pro), and a thermometer or TDS meter if you can. A cheap knock‑off scale will lie. Use good burrs.
Control the variables
Use the same beans and the same roast date. Use one dose weight. Use one tamp. Use the same water. Note machine temperature or let it rest until steady. Flush the group head before shots. Record everything. Take a photo of each puck and each shot. Numbers matter more than memory.
Tests to run (fast, repeatable)
Log and look
Keep a simple table or notebook. Record: date, beans, grind step, dose, yield, time, temp, and one sentence tasting note. Snap a photo each run. Over a week you will see trends. You will spot the single setting that matters.
Next you will learn which numbers truly matter and how to read them.
Benchmarks That Matter: Metrics and How to Read Them
Core metrics to track
You must measure what you taste. Track: shot time, output weight, brew ratio, TDS, and extraction yield. Write each number down. Run five shots. Look for patterns, not one perfect pull.
If TDS is low and cups taste thin or sour, grind finer or lengthen time. If TDS is high and bitter, go coarser or cut time.
Temperature, steam, and recovery
Note boiler/group temp swing across five shots. Keep swing under 2 °C for tight control. Under 5 °C is usable. Over 5 °C will change taste between pulls. Test steam by timing how long it takes to raise 300 ml of milk to 60–65 °C. If it takes more than 45–90 s, steaming will slow your service.
Consistency scoring (quick)
Pull five nominally identical shots. Compute mean and standard deviation for time, weight, and TDS. Use these quick thresholds:
If two or more metrics fail, the machine will frustrate you on busy mornings.
Read the charts
Plot dots not lines. A scatter shows drift and outliers. Use median trends. Trust repeatability over a single great number. Note noise and maintenance: loud pumps and frequent descales add real cost. Log the upkeep and the sound level in dB. Those will shape daily use more than peak specs.
Semi‑Automatic Deep Dive: Hands‑On Tuning and Results
Start with the basics
You pull the shot. You hear the hum. You change one thing at a time. Grind. Dose. Tamp. Make small moves and write numbers. Aim for a repeatable rhythm. Treat the machine like a tool, not a mystery.
Tune grind, dose, tamp
Set a target dose. Pull a shot. Adjust grind one notch finer if it runs fast. Cut grind if it drips. Change dose in 0.1–0.2 g steps. Tamp with steady force. Use a 58 mm tamper if you can. Track time and weight for five pulls.

Test pre‑infusion, pressure, PID
Turn pre‑infusion on and off. Note crema and channeling. Add a short pre‑infusion to calm fines. Watch the pressure gauge. If you see spikes above 10–11 bar, the puck may choke and taste harsh. If pressure never hits 8–9 bar, the coffee will taste weak. Use the PID to nudge temp up or down by 1–2 °C. Small moves change taste a lot.
Measure steam and build quality
Time how long it takes to heat 300 ml milk to 60–65 °C. If it takes over 60–90 s, steaming will slow you. Check the wand reach, knob feel, and steam tip holes. Inspect portafilter fit, group gasket, and easy access to pumps and boilers. Ask if parts are sold locally.
Bench numbers and tasting notes
Example run: 19 g dose → 38 g yield in 28 s → TDS ≈10.2% → EY ≈20%. Result: syrupy body, mild fruit, clean finish. If you get thin, sour shots, go finer or raise temp. If bitter and flat, coarsen or drop temp.
What to fix, accept, and demand
Fix: wild pressure swings, inconsistent dosing, bad steam power.
Accept: learning curve, need for a good grinder.
Demand: serviceable parts, pressure gauge, and a solid steam wand.
Move on to test the fully and super‑automatic paths with these lessons in hand.
Fully‑Automatic Focus: Push‑Button Tests and Tradeoffs
The premise
You press a button. The machine doses. The machine times. You get a cup. This section shows you how to test what it controls and what it hides. You want consistency. You also want to know where nuance is lost.
Dosing accuracy and repeatability
Run five identical espresso cycles. Weigh the dry beans used and the liquid yield. Note shot times. Look for:
Try Philips 3200 LatteGo, De’Longhi Magnifica S, or Jura E6. They show the range: some hit tight repeatability, some wander.

Temperature stability and brew strength
Pull three back‑to‑back shots. Measure cup temperature and taste for flatness or bitterness. Check if the machine lets you set brew strength or temperature. If not, expect the built‑in profile to rule the cup. Note any cool‑down lag or long recovery between drinks.
Milk routines and manual override
Run the milk program three times. Watch foam quality, texture, and heat. Time how long it takes to steam 200 ml milk. Test manual steam if the machine offers it. Some fully‑autos let you nudge texture. Most do not.
How much control do you keep?
You can tweak grind, cup size, and strength. You can clean and descale. You rarely tune extraction like on a semi‑auto. You trade hands‑on craft for speed and sameness.
Tradeoffs and real use
In a busy kitchen, the fully‑auto wins. It delivers repeatable cups to many people. In quiet moments, you may miss the craft. Next, we dig into super‑automatics and the full bean‑to‑cup promise.
Super‑Automatic: Bean‑to‑Cup Reality and Benchmarks
You want full convenience. You want a real shot. Super‑autos promise both. They grind, dose, tamp, brew, and milk with one touch. You still need to test what they actually do.
What to test and how
Run five shots back‑to‑back. Time from first grind to poured cup.
Try a Jura Z8, Miele CM6, or Saeco Xelsis to see different pump profiles and tamp systems.
Milk systems and real cups
Test three milk drinks in a row.
Freshness, cleaning, and upkeep
Track beans’ time in hopper. Fresh beans matter. Grind retention can stale doses overnight.
Speed, flavor, and who wins
Super‑autos are fast. They give consistent cups to many people. They lose some nuance vs a good semi. They shine where speed and zero fuss matter.
Next, you’ll get the final guidance to pick and act on the right path for your life and kitchen.
Choose and Act
You now know the tradeoffs. Pick control or pick convenience. Test two or three machines from your shortlist. Run the simple lab checks. Watch the shots. Note the grind, dose, and yield. Tune one variable at a time. Trust your hands. Trust your palate.
Buy the machine that fits your routine and your space. Set it up. Use it every day for a week. Keep notes. Small changes matter. Stick with what feels right. Make one good shot. Then make another. Enjoy the work. Enjoy the cup. Share a photo and your score. Join a local group or roast club.
 Previous Post
 Next Post
Okay, full disclosure: I am the kind of person who reads ‘Benchmarks That Matter’ like it’s a thriller. 😂
This article scratched that itch. The metrics section made me actually understand why my shots taste flat sometimes — it’s not just ‘bad beans’, it’s an extraction yield and TDS thing.
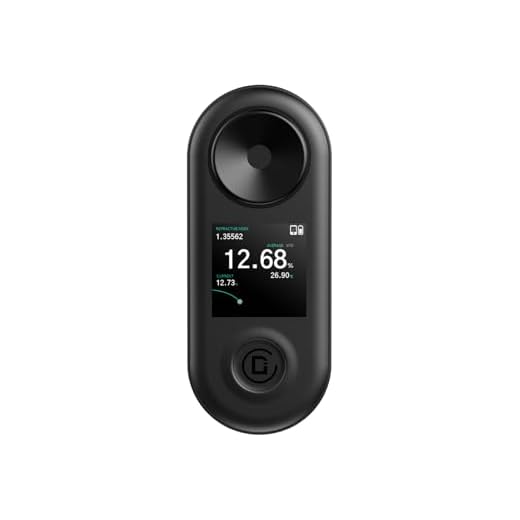
I set up the lab using the Compact 20-Bar Espresso Machine with Frother and the Portable Coffee TDS Refractometer for Precision. I ran the simple tests over three days (different tamp pressures, grind settings, and puck prep) and logged everything in a spreadsheet.
Top takeaway: small grind tweaks + consistent dose mattered way more than I thought. Also, the article’s semi-auto tuning checklist saved me a lot of trial-and-error.
Couple of suggestions for the author: include a downloadable checklist and maybe a sample spreadsheet — would make this post a 10/10.
Totally agree about the spreadsheet — I started one after reading and it’s helped me map which beans respond best to which temp/grind combos. Any chance you’ll add recommended baseline recipes for the Compact 20-Bar model?
We will. Expect a ‘starter recipes’ table for common machines (Compact 20-Bar, Barista Express, Philips 3200) showing dose, time, and target TDS ranges. Thanks for the idea!
Love that you ran a three-day test — exactly the kind of approach we wanted to encourage. We’re working on a downloadable CSV version of the sample log and a one-page checklist for the next update.
Gonna steal your method and run a 3-day test too. What grind setting did you start with on the Compact? (I know them machines vary but a ballpark would help.)
Me after reading ‘Choose and Act’: buys every product on the Amazon list because I can’t choose. 😅
Real talk — the Fully‑Automatic Focus section really put into words why I end up with inconsistent crema on the Philips 3200. The push-button convenience is great but man, the tradeoffs in grind uniformity are real.
Funny thing: the ‘Complete Coffee Brewing Kit with Refractometer’ looked like overkill until I tried measuring shots. Now I feel like a caffeine-powered chemist. Be warned: this is how you become that person who roasts beans and argues about extraction percentages at brunch. 😂☕️
Also, small typo on page 12 (or maybe my browser) where ‘extraction yield’ is duplicated.
Solid piece overall, would love a video series next time.
Samir — no shame. I started with the Compact 20-Bar and now have a small lineup. If you want less drama than full roasts, try single-origin light roasts for clearer tasting notes.
If anyone wants, we can add a short ‘beginner’s pathway’ that recommends one affordable machine from each path (semi, fully, super-auto) and a starter kit from the Amazon list.
Hah — we accept responsibility for creating more coffee nerds. Video series is on the roadmap, including quick clips for each hands-on test. Thanks for spotting the duplicate — we’ll fix that typo right away.
Same, haha. I roast at home now and my friends hate me. Tip: if you decide to roast, get a basic refractometer first so you can tune post-roast extraction.
Loved the ‘Find Your Machine’ flow — finally something that separates hype from reality.
I ended up leaning toward a semi-auto after reading the ‘Semi‑Automatic Deep Dive’ and the hands‑on lab stuff. The suggestion to use a Portable Coffee TDS Refractometer for Precision was gold; I borrowed one and it really made dialing in the Barista Express feel scientific instead of guesswork.
Also appreciate the benchmark tables — made it easy to compare a Compact 20-Bar Espresso Machine with Frother vs a Philips 3200 Fully Automatic Espresso Machine.
Tiny nit: wish there were more photos of the test setup in the ‘Build Your Hands‑On Lab’ section.
Overall — practical and not preachy. 👍
Great to hear you tried the refractometer! Did you use the Complete Coffee Brewing Kit with Refractometer or just the portable TDS? I’m debating which to buy — price vs portability dilemma 🙃
Thanks Laura — glad the Barista Express + refractometer combo worked for you. We’re planning to add a photo set for the lab setup in a follow-up post (and include camera angles for tamping and shot timing). Any specific shot metrics you tracked that you found most useful?
We tested both. The Complete Kit has more accessories (funnels, syringes) which helps when you’re first learning; the Portable TDS is quick for on-the-go checks. If you’re primarily experimenting at home, the Complete Kit speeds up repeated measurements.
Short take: super-automatics are tempting for lazy mornings, but the article did a solid job showing the tradeoffs. The Philips 3200 Fully Automatic Espresso Machine looks great on paper but you give realistic notes about ‘bean-to-cup’ consistency.
Question: anyone tried the Versatile Ninja Espresso and Coffee Barista System alongside a portable refractometer? Thinking of pairing them.
I actually have the Ninja system. Paired with a refractometer it gets consistent results for drip/espresso hybrids but it’s not as tweakable as the Barista Express. Good for convenience, meh for obsessives.
Thanks Marcus — we ran a quick bench comparing Ninja vs an Automatic Espresso Machine with Built-in Grinder using extraction yield and TDS. Ninja scored well for milk texture and speed; the built-in grinder model had better consistency across bean batches.
Good stuff. I appreciated the neutrality in ‘Understand the Three Paths’ — not every article shoves the super‑automatic as the end-all.
I started with a cheap Compact 20-Bar Espresso Machine with Frother and eventually upgraded to the Barista Express Espresso Machine with Grinder because I wanted more control. The ‘Hands‑On Tuning’ section was the deciding factor.
One question for other readers: how often do you recalibrate your refractometer? I admit I forget sometimes and then get inconsistent readings.
Little critique: the product links felt a bit Amazon-y — maybe include an independent buying guide next time?
Thanks Hannah — great point about recalibration. We recommend checking the refractometer weekly if you’re testing daily, or before each multi-shot session otherwise. We’ll also add a short calibration procedure to the checklist.
Regarding Amazon links: we’re matching items readers can easily find, but we’ll include alternative buying tips and categories in the next edit.
I recalibrate mine every 2 weeks and after any big temp change in the room. Seems to help. Also, cheaper kits can drift more so keep that in mind.