Make Your Coffee Bar Cabinet Work for You
Why Your Coffee Bar Cabinet Matters
You drink a lot of coffee. You want it easy and good. A coffee bar cabinet is your home base. It keeps gear close. It protects beans from air and light. It makes the routine faster and calmer. It can look like you.
Plan. Pick. Arrange. Care. These steps turn a shelf into a tool. You will learn what to store where. You will learn what to hide. You will learn what to show. You will set up a flow that fits your morning and your space.
This cabinet will save minutes. It will improve each cup. It will make your coffee feel intentional. Use it well and it will reward you every day.

Organizing My Coffee Cabinet: A Cozy, Efficient Space for Every Cup
Plan Your Coffee Bar Cabinet
Start with purpose
Decide what you want. Do you want fast pour-overs or a full espresso set-up? Do you need a station for guests or just one for yourself? Keep the answer simple. It guides every choice.
Map the space
Measure width, depth, and usable height. Note where outlets live. Mark light sources and any plumbing. Check door swing and drawer clearance. Write these down. Bring a tape measure when you shop.
Inventory your gear
Count what you own and what you will buy. List machines, grinders, pitchers, scales, mugs, filters, and beans. Note each item’s footprint and plug needs. Check machine specs before you slot them in. For example:
Sketch a workflow
Draw a simple plan on paper. Place the machine where you brew. Put grinder near it. Keep mugs and pitchers within arm’s reach. Make a “dirty” zone for used grounds and a “clean” zone for cups. Think of one path from beans to cup. Short paths save time.
Define must-haves vs nice-to-haves
Make two lists. Must-haves are things you use daily: machine, grinder, scale, tamper. Nice-to-haves are items you want but rarely use: specialty filters, extra pitchers, decorative jars. This keeps the cabinet uncluttered.
Set a budget
Decide on a total spend. Split it into tiers: gear, storage, and extras. A clear number stops impulse buys and keeps the plan real.
Act on the plan. Measure twice. Place items for reach. Work from how you move, not where things look good.
Pick the Right Cabinet for Your Routine
Freestanding vs. built-in
Choose form to fit your life. Move often? Pick freestanding. You can shift it, change rooms, or sell it. Want a clean line and built-in look? Go custom or use IKEA SEKTION for a polished fit. Built-ins hide cords and look sharp.
Height and reach
Think of how you brew. Sit to sip? A low counter pairs with stools. Stand and tamp? You want a higher surface. Try the machine at the real height before you buy. Short people and tall people see work very differently.
Drawers, shelves, and tops
Look for features that save steps and stress. Deep drawers stow cups and bags. Pull-out shelves let you slide heavy machines out to clean. A solid top resists heat and stains. Wood warms the room. Laminate and metal shrug off spills.
Important features to check now:
Ventilation and weight
Grinders and machines need air. Heat builds up fast. If a cabinet traps heat, motors fail sooner. Leave a few inches at the back. Add vents or cutouts. Note machine weight. The Breville Barista Express is about 23 lb. The Rancilio Silvia runs near 30 lb. Make sure the cabinet bears that load. A flimsy shelf will sag. Test it with weight or ask the maker.
Choose what fits your flow. Pick durability over looks if you use it daily. Small choices now save time and grief later.
Design for Flow and Function
Zone your cabinet
Split it into clear zones. Make a brew zone for your machine and kettle. Make a prep zone for scales, tampers, and pitchers. Make a cup zone for mugs and glasses.
A clear map saves time. You will knock out shots faster. You will keep counters clean.
Grinder and beans
Place the grinder close to the machine. You cut steps and keep grind losses low. Baratza Encore sits light and steady for drip. Baratza Virtuoso+ or Eureka Atom work better for espresso. Keep beans near the grinder. But do not store them by heat. Ovens and hot pipes kill flavor.
Waste and cleaning
Put waste and used grounds near a sink or a bin. A small pull-out trash under the prep zone works well. Keep a damp cloth and a brush in the same drawer. You will wipe spills before they stain.
Arrange tools by use
Group tools by task. Keep daily gear at arm’s length. Move backups higher or lower. Use labeled trays so hands find what they need. A tamper drawer and a pitcher shelf speed the morning rush.
Work surfaces, trays, lighting, and power
Install pull-out trays to work on. They let you slide a heavy machine out. Add task lighting under shelves. Map an outlet to each device. Use a surge strip for the grinder, machine, and kettle.
A pull-out shelf and a light change a slow routine into a fast one. Next you will learn how to store and protect your gear so it lasts.
Store and Protect Your Gear
Beans first
Keep beans away from air, light, and heat. Buy whole beans and grind just before brew. Whole beans hold flavor longer. Buy an airtight canister with a good seal. Clear windows help you see levels without opening the lid.

Grinder care
Keep grinders dry. Coffee oil and moisture gum up burrs fast. Brush and empty the hopper after each bag. Backflush or clean grind chambers on a set schedule. Use anti-vibration pads under the grinder to cut noise and wobble. Sorbothane pads or rubber feet work well for small grinders like Baratza models.
Drawers and small parts
Fit one drawer with dividers for filters, spoons, tampers, dosing funnels, and cloths. Use shallow trays so items don’t get buried. Stackable trays are great for pods, syrups, and single-serve items. They save space and keep stock visible.
Under machines and cables
Place mats under espresso machines and kettles to catch drips. Use a dedicated drip tray under pour-over setups. Route power and data cables out of the way. Label each cord at both ends. It saves you from morning blind searches.
Milk and fragile gear
If you keep milk, add a small fridge nearby. A mini fridge or an under-counter unit works. Store fragile glassware in padded drawers or use silicone sleeves. Glass lasts longer when it sits in felt or foam.
A tidy cabinet prolongs gear life. It saves you from late-morning hunts for a tamper or a lid. Next you will learn how to style your bar so it feels like yours.
Style It to Your Taste
Pick a calm palette
Choose colors that soothe you. Warm wood calms. Clean white clears the mind. A soft gray or muted green works too. Keep contrast low. That makes the space feel quiet and tidy.
Easy-to-clean surfaces
Add a small backsplash for quick wipes. Subway tile, stainless steel, or a peel-and-stick tile work well. Metal holds up to steam and coffee oil. Peel-and-stick is fast and cheap for renters. Use grout sealer on real tile to keep stains out.

Show a few favorites
Put out three mugs, not a dozen. Pick mugs that mean something. Stagger them by height. Let one be a daily go-to. Open shelves make the scene warm. Closed doors keep clutter behind the scenes.
Match jars and trays
Use matching jars for beans and sugar. Vacuum jars like Fellow Atmos lock fresh taste. OXO POPs save space and look neat. Put syrups and spoons on a tray. A tray keeps spills contained and moves everything at once when you clean.
Little life, carefully placed
Add one small plant. Add one simple print. That is all you need. Too many items shout. One living thing softens the hard lines. A single print gives the eye a place to rest.
Clear labels, hidden extras
Label jars in a plain font. Use a Brother P‑Touch or neat chalk labels. Label both front and side if a jar sits in deep shelves. Keep bulk, backup beans, and odd tools behind doors or in drawers.
Quick styling checklist:
Style it with restraint. Small choices turn a cabinet into a ritual space.
Keep It Clean and Let It Evolve
Daily habits that take minutes
Wipe the counter after each drink. Toss used grounds into the compost or bin. Rinse portafilters or pods. These small acts stop oil and stain build‑up. They save time later. Many home baristas report a cleaner cabinet in weeks when they wipe every day.
Weekly and monthly care
Brush your grinder after every few uses. Empty the catch tray. Rinse removable parts on espresso machines weekly. Deep clean and descale machines monthly or every 2–3 months if your water is hard. Replace water filters per the maker’s guide. A clean machine makes a better cup.
Protect beans and seals
Check canister lids and seals often. Stale air ruins flavor. Rotate beans so the oldest are used first. Aim to drink whole‑bean coffee within two to three weeks of roast for peak taste. Use airtight jars to cut oxidation.

Spare parts and smart packing
Keep a small box for spare filters, O‑rings, screws, and a brush. Label it. When a part fails, you’ll fix it fast. Store less‑used syrups, filters, and bulk beans in a nearby cupboard. Keep the counter clear.
Let it change with you
Revisit your layout after a few weeks. Move items that slow you down. If you start making more milk drinks, move the frothing pitcher within reach. If you stop using a tool, remove it. Add a new gadget when it serves your routine. A cabinet that adapts will last.
When these habits sit in place, you’ll be ready to make the cabinet truly yours.
Make It Yours
A good coffee bar cabinet works. It saves time. It protects your gear. It lifts your morning. Start small. Plan well. Keep it tidy. Let it change with you.
Make choices that fit your routine. Choose what you use. Store what you love. Clean as you go. Swap items as your taste shifts. Your coffee will taste better. Your routine will feel calm. Begin today. Build a place that serves you. Enjoy small wins each morning and savor the day.
 Previous Post
 Next Post
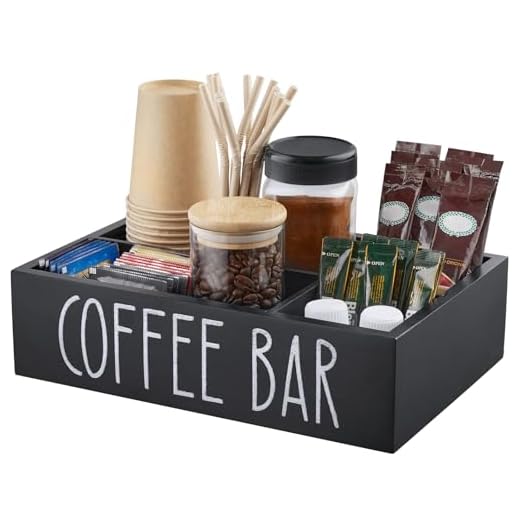
Quick question: Is the Wood Coffee Station Organizer with Removable Dividers deep enough to hold a small milk pitcher and tamper side-by-side? Also, are the Three-Piece Glass Coffee Canister Set with Shelf lids airtight or just decorative?
I fit a 12oz milk pitcher and tamper in mine but had to shift dividers. If you want zero guesswork, measure your tools first — saved me a return 😅
Good Qs Jon — depth varies by model, but most organizers fit a tamper + a small pitcher if you remove one divider. For the glass set, lids are usually airtight-ish but not as reliable as the Airtight Stainless Steel Coffee Canister with Window. We recommend the stainless for long-term bean storage.
Nice roundup, but a couple of things to add:
1) The Three-Piece Glass Coffee Canister Set with Shelf looks cute but glass = fragile. If you have kids/pets I’d prefer stainless.
2) The Two-Tier Coffee Mug Holder with Twelve Hooks is clever, but measure your mugs first — oversized latte mugs might not fit well.
Otherwise the styling tips are great. Felt a bit light on maintenance specifics though (descaling schedules, etc.).
Descaling: every 1-3 months depending on water hardness and use. I keep a small jar of descaler in one of the cabinet drawers (Farmhouse cabinet shoutout!).
Agree about the mugs — my wide-handled travel mugs didn’t fit on the two-tier. Ended up using the hooks for smaller cups and storing big ones on a shelf.
Also, glass canisters look great on open shelves. If you keep them inside a cabinet, I think stainless with a window is the best compromise.
Thanks Samir — valid points. We mentioned glass for aesthetics but should’ve emphasized durability and kid-friendly options. We’ll expand the maintenance section including descaling frequency for common machines.
We’ll add those specific intervals and a quick guide on choosing glass vs stainless in the next edit.
Why is no one talking about coffee stains on the cabinet finish? I got a Two-Tier Coffee Mug Holder with Twelve Hooks and now there’s a ring of ‘latte art’ on my counter. 😂
Article is great otherwise — the ‘Make It Yours’ part made me laugh. I’m gonna put a tiny succulent on mine and call it a day.
I put a thin silicone mat under my holder. Looks fine and wipes clean. Also, microfiber cloth + mild soap for daily wipe-downs.
Good call — we should include stain prevention and quick-clean tips. A coaster under the mug holder or a washable mat can help a ton.
Nice — silicone mat sounds perfect. Also gonna add a succulent. If it survives my care, it’s a miracle.
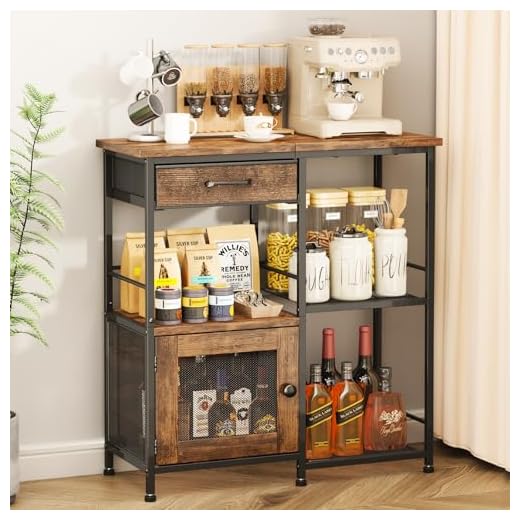
Love this—finally someone making the coffee bar feel less like a cluttered corner and more like a little ritual station. I got a Farmhouse Coffee Bar Cabinet with Drawer Storage last year and adding a Two-Tier Coffee Mug Holder with Twelve Hooks saved so much counter space.
Pro tip: put the Airtight Stainless Steel Coffee Canister with Window near the grinder so you can eyeball levels without opening it every time. The section on Design for Flow and Function nailed it.
That sounds cozy. Does the farmhouse cabinet have enough room for a mini fridge? I’m tempted but worried it’ll take too much space.
Totally agree — I put my Two-Tier holder inside the cabinet door and it’s a game changer for small kitchens.
Thanks Maya — glad the farmhouse cabinet is working out! Great tip about placing the canister near the grinder. We wrote that tip after watching too many coffee-fumbled mornings 😅
This article helped me rethink my tiny counter situation. I bought a Wood Coffee Station Organizer with Removable Dividers after reading the Plan Your Coffee Bar Cabinet section.
Why I liked it:
– Removable dividers mean I can fit a milk frother one week and a tamper the next.
– The Airtight Stainless Steel Coffee Canister with Window keeps beans fresher than the plastic stuff I’d been using.
Couple of small complaints: the article could’ve included more on cord management (lol) and dims of common cabinets would be helpful.
Great feedback, Lena — we’ll add a section on cord management and typical cabinet dimensions in the next update. Glad the wood organizer worked for you!
For cords I use stick cable clips on the back of the cabinet and label plugs. You’d be surprised how tidy that makes things.
I’m all about the Large Coffee Bar Cabinet with Mini Fridge Space—because yes, iced coffee deserves a proper home. 😂
Wondering if anyone has tips on routing power for a mini fridge + espresso machine without tripping breakers? Also, the article’s part about “Keep It Clean and Let It Evolve” is solid — my setup changed three times in two months.
I had the same issue — ended up using a smart strip that senses load, plus moved the grinder to a different outlet. Not perfect but better than constant trips.
If you live in an older place, definitely get an electrician. Learned that the hard way when the breaker kept tripping mid-pour… ruined a latte.
Glad you liked that section, Ethan. For power: run dedicated circuits for heavy appliances if you can, or at least stagger usage (no simultaneous big draws). A licensed electrician is the safe bet.
Also, placing the mini fridge in the Large Coffee Bar Cabinet with proper ventilation helps it run more efficiently — don’t block the vents!
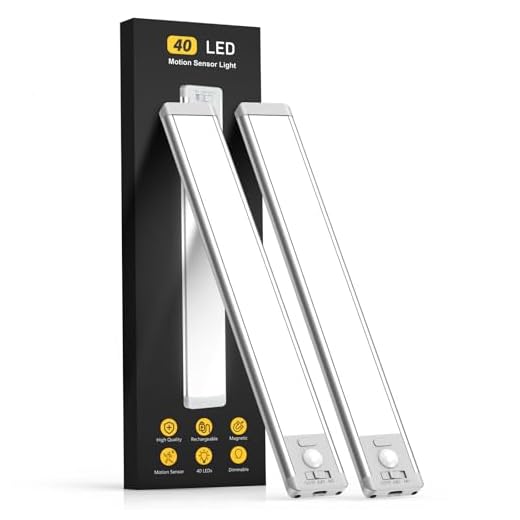
Short and sweet: bought Rechargeable Motion Sensor Under-Cabinet LED Lights after reading the Design for Flow tip. Night pours are now so much easier. 👍
Mine dim after a while; pro tip: keep a small USB power bank in a drawer if your lights are rechargeable and you don’t want to remove them often.
Yesss — those lights are one of our favorite small upgrades. Saves time and looks slick.
Big post, thanks. A few thoughts from someone who moved twice last year and rebuilt her coffee nook each time:
– ‘Pick the Right Cabinet for Your Routine’ is the most important line. I went with a Farmhouse Coffee Bar Cabinet with Drawer Storage for the drawers (filters, pods, chargers) and a small slot for the Three-Piece Glass Coffee Canister Set with Shelf.
– ‘Store and Protect Your Gear’ saved my grinder — I added a small felt-lined drawer divider from the Wood Coffee Station Organizer to cushion it.
– Rechargeable Motion Sensor Under-Cabinet LED Lights are a must for early mornings. The stainless canister with a window was a tiny luxury purchase that actually helps me stop opening the container every 30 minutes lol.
All in all this is a great guide for people who want organized but still personal coffee setups. Keep evolving the article with reader tips!
Amazon sells decent adhesive felt rolls. Not high-end but they work for cushioning and are cheap enough to replace if needed.
Does anyone know where to find affordable felt liners? I bought expensive ones and regret it 😅
Amazing — thanks for sharing your real-world trial-and-error, Hannah. Love the felt-lined divider idea. We’ll add a ‘reader tips’ sidebar to capture things like that.
Felt-lined dividers = genius. My grinder was noisy and scratched the cabinet before I did something similar.