Master Your Portafilter. Pull Better Shots
Why Your Portafilter Matters
You hold the gate to great espresso. The portafilter shapes your shot. A good portafilter gives you control. A bad one hides the work. A bottomless portafilter shows the whole play. It reveals what the puck does. It tells you where to change grind, dose, and tamp. You will see the truth.
This guide cuts through jargon. It gives clear steps. You will learn to read the flow. You will learn to fix it fast. Short lessons. Hard results. Use the tool with intent. Watch the shot. Make small changes. Repeat until the flow sings. Record each change. Note time, temp, and yield. Trust your eyes. Trust your hands. Start small. Keep notes. Improve daily. Stay curious. Stay patient now.


Master the Perfect Espresso Shot: Quick, Pro Tips
Know the Tool: Portafilter Anatomy and Types
You must know the parts. You must know what each part does. A small fault will change the shot.
The parts and why they matter
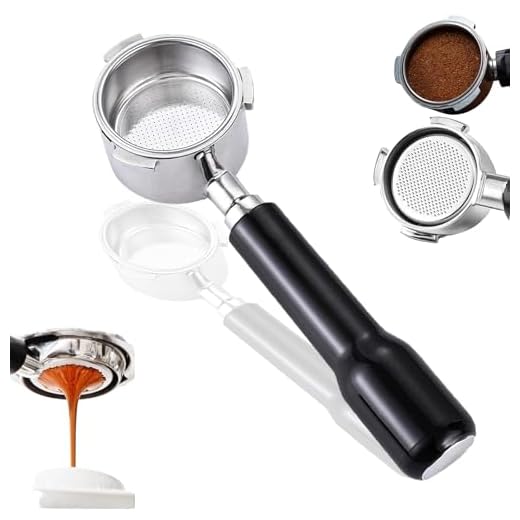
The handle gives you leverage. The basket holds the coffee. The spout directs the flow. The gasket seals the group head. Each part affects pressure, flow, and taste. A nick in the basket rim will cause a leak. A hardened gasket will allow channeling.
Basket types: pressurized vs true
Pressurized baskets trap some flow to build crema. They hide grind and tamp faults. True (non-pressurized) baskets demand care. They reward you with clarity and control.
Gaskets and fit
Spring gaskets snap in. Solid (rubber or silicone) gaskets sit tight. A spring can ease portafilter fit on older machines. A solid gasket gives a firmer seal on modern groups. Fit is king. The portafilter must sit flat. No wobble. No gap.
Materials and wear
Brass and stainless hold heat well. Chrome plating can flake over time. Inspect for pitting, warped ears, loose threads. Check the spout for bends. Look for hairline cracks in the handle. Replace small parts before they ruin shots.
Quick checks to do now:
You will learn more when you watch the shot come out. The next section shows why a bottomless portafilter makes those faults visible.
Why Use a Bottomless Portafilter
You will see the shot. You will learn fast. A bottomless portafilter strips the mystery. It shows the stream, spray, and channeling as they happen.
What it shows
You watch the first drop. You spot a thin jet on one side. You spot a spray. You spot a slow pulse. Each sign maps to a fault: grind, dose, tamp, or a bad seal. In one brew I fixed a 20-second pull to a steady 26 by spotting a side jet and reworking distribution. The shot changed instantly.
How to use it
Use the same tamp you always do. Clean the group. Lock in place. Start the shot and watch. If you see a cone, you are near even extraction. If you see a line, stop. Adjust grind or distribution. Try these quick moves:
Benefits you get
Tradeoffs and fixes
You will get splash. The first pulls are messy. You may wet your counter. You need a steady wrist and calm hands. If spray is wild:
A bottomless portafilter is a training tool and a probe. Use it to find problems. Then fix them. The next section shows precise prep steps you can apply.
Prep Like a Pro: Dose, Grind and Distribution
Good shots begin before water hits the coffee. You set the stage with dose, grind, and how you lay the grounds in the basket. Small, steady moves beat wild swings.
Weigh and dose
Weigh every dose. Use the same basket. A 18–20 g double should feel like habit. A scale removes luck. If you change dose, change your tamp and be ready to tweak grind. I once cut a 28-second pull to 24 by returning to a known 19 g dose.
Dial the grind
Adjust in small steps. Turn one notch finer, pull, note the time. If the shot gushes out in 15 seconds, go finer. If it drips at 45, go coarser. Many grinders react fast — Baratza Sette users will see big jumps per step. On stepless grinders like Eureka or Mazzer, make micro turns.
Distribute with purpose
Stop channeling before it starts. Try these simple methods:
Cut off pockets and know when to change
Look for high spots. Scrape them down or add a pinch and re-level. If you fix distribution and still see uneven flow, change grind or dose. Faster flow → finer grind. Thin body or sour taste → more dose or finer grind. Bitter, slow shot → coarser or less dose.
Quick drills
Next you will learn how to lock that prep into a true tamp—and why tamp pressure and angle finish the job.
Tamp with Purpose: Pressure, Level and Angle
Tamping sets the scene. You want a flat, even puck. You push straight down. You use steady force. You keep the wrist quiet. You avoid tilt. You polish with a short twist if you like.
Why tamp matters
A bad tamp starts a bad shot. Uneven puck. Fast tunnels. Bitter spots. With a bottomless portafilter you see the result in real time. Streams tell you where the puck failed. Tamping controls that.
How to tamp: step-by-step
Place portafilter on a flat surface or in a tamping station. Center the tamper over the basket. Press down in one smooth motion. Stop when the tamper meets solid resistance. Hold for a beat. Polish with a light 1–2 second twist if you choose. Withdraw straight up.
Aim for the same force every time. Many baristas target about 30 lbs. That number matters less than repeatability. If you can’t feel that, use a calibrated tamper.
Tools and when to change pressure
Calibrated tamper for consistency (Pullman, Espro models). Palm tamps for speed at busy bars. Levelers when distribution is the weak link. Use a spring-loaded tamper when you need constant force without fuss.

Change pressure when you change dose or basket depth. If the puck feels mushy, tamp lighter. If the puck compresses too much and chokes, tamp lighter and coarsen the grind. If you see channeling down one side in a bottomless shot, check for tilt.
Quick checks and drills
Next you’ll learn to read those streams and fix the issues they reveal.
Read the Flow: Diagnose and Fix Common Issues
The flow tells the truth. Watch it through a bottomless portafilter. Small signs reveal big faults. Act fast. Fix fast.
Channeling — thin pinhole or single jet
A thin jet means water found a path. The puck failed.
Spray or scalloped spray — clumps or uneven tamp
Spray looks like a fountain. It tastes bitter and thin.
Off-center stream or one-sided flow — misalignment or cracks
The stream hugs one edge. The puck may be cracked or the basket off.
Slow drip or choked flow
It drips like a faucet. Shots taste sour and weak.
Fast blonding or quick gush
It pours too fast. The espresso is thin and bright.
Use the bottomless as your mirror. Watch. Adjust. Repeat. Next you’ll lock these fixes into a routine.
Practice, Record, Improve: Routines and Advanced Tips
Set simple drills
You get better by doing. Do short, repeatable drills. Pull three shots. Change one thing each time. Watch how the flow changes. Train your eye until channels shout at you.
Do blind tamping to feel pressure and level. Do timed tamp reps. Short sessions beat long, sporadic ones.
Record and review
Log everything. Grind, dose, tamp note, time, yield, machine temp. Use your phone to film the flow. Compare frames side by side. Note where jets start and when blonding begins. Over weeks, patterns emerge.

Watch the footage after you taste. A one-frame difference can tell you a lot. Train to spot symmetry and tiny sprays.
A week-long practice plan
Day 1: baseline shot. Record everything.
Day 2: three-grind drill. Log results.
Day 3: dose micro-adjusts (±0.2 g).
Day 4: blind tamp practice.
Day 5: distribution tools vs. funnel test.
Day 6: basket swap — single vs. double, ridged vs. precision.
Day 7: pick best recipe and re-pull three times.
Each day keep notes. Repeat the whole week with a new bean.
Advanced tricks
Make micro-adjustments. Change dose 0.1–0.2 g or grind one burr click. Use a funnel when your grinder flutters or you have a narrow spout. Re-distribute when you see early channeling. Swap baskets to control flow shape. Use the bottomless portafilter to craft recipes and tame new beans. Try a Baratza Sette for fast dialing, or a Mazzer Mini S for steadier particle distribution. Shoot video at 120 fps for fine detail.
Keep the drills short. Keep the records honest. Then move to the final tweaks in the Conclusion.
Pull Better Shots, Every Time
You now know the tool and the way. You can see the shot. You can fix what you see. Use the bottomless to learn. Use routine to improve. Small changes add up. Keep notes. Keep the work simple.
Tweak dose, grind, tamp, then watch the flow. Read it. Adjust. Log each pull. Trade tricks with others. Practice with care. Record times, yields, and quirks. Build a short routine. Aim for repeatable shots. Trust your notes. Pull better shots. Make coffee you trust. Stay curious. Measure more. Small wins become lasting skill, craft, and joy daily.
 Previous Post
 Next Post
Awesome piece — finally someone talking about portafilters like they deserve. I switched to the Normcore 54mm Bottomless Portafilter for Breville last month and the clarity in the cup is wild.
Question: when I distribute and tamp the puck I still get sporadic channeling on one side. I tried a WDT and leveled tamp, but it keeps happening. Any quick diagnostics I can do at home before blaming the machine?
Are you sure the portafilter is perfectly seated? I had a similar issue and it was the flange not locking in straight. Also check the IMS basket size — sometimes a different basket reduces side channeling.
Glad you liked the article, Maya — awesome you’re on a bottomless. Quick checklist:
1) Check basket fit (IMS vs stock) — an ill-fitting basket can cause uneven flow.
2) Inspect grind distribution (WDT + tap) and try a single tap on the side that channels to settle grounds.
3) Try the Normcore V4 Spring-Loaded 53.3mm Coffee Tamper if your tamp pressure varies; spring-loaded gives more consistency.
If it persists, shoot a short video of the shot — we can often see what the flow tells us.
Also consider grind too fine on one side (grind distribution isn’t always even from the grinder). I use a small distribution tool and then tamp level — reduced channeling a lot.
The Maestri House Mini USB-C Espresso Scale recommendation is solid. Quick question: Do you weigh the whole shot (brew weight) or only the cup after pulling? Also, what’s your recommended dose range for a 54mm basket? I usually aim for 18–20g but curious about push to 22.
I like numbers so here’s my routine in case it helps:
– Dose 19g (IMS 18–22g basket)
– Grind until a 25–30s extraction yields 36–40g
– Tamp 30 lbs with my Normcore V4
Is it dumb to try 22g on the same basket? Want to push into a fuller body but worried about over-extraction.
Weighing during the pull is clutch — I never go back to eyeballing. Also, Maestri scale is tiny but accurate.
Good routine. Weigh the brew weight (cup) during the pull — that gives WDT and shot ratio. For a 54mm basket:
– 18–20g is a sweet spot for many; 22g can work but you might need to coarsen the grind to keep extraction time reasonable.
– Shot ratios: try 1:2 (19g → 38g) as baseline, then adjust to taste. If 22g, you might target 44g or pull shorter (1:1.8) depending on flavor.
Always watch flow characteristics with bottomless — slower streams that look syrupy often mean finer grind/higher dose.
I moved to 22g once and had to open the grind a lot — but the mouthfeel was great. Just be ready to retune everything.
Newbie here — tried the bottomless portafilter for the first time after reading this and WOW. Seeing the flow helped me realize my grind was too coarse. Switched to the IMS Precision 18–22g Competition Filter Basket and my espresso actually tasted like espresso and not brown water.
Huge thanks for the clear steps. 😭
That’s what we love to hear, Lucia! Bottomless portafilters are brutally honest teachers. Keep logging your shots with a simple notebook or the Maestri House Mini USB-C Espresso Scale — small adjustments add up.
Congrats! If you’re dialing in, try a few back-to-back shots and change only one variable at a time (grind, dose, tamp). Makes learning faster.
Random tech dive: the article mentions a 51mm Bottomless Portafilter with 304 Basket. If I have a machine that uses 54mm normally, can I swap to 51mm or are these totally incompatible? Thinking about adding a second portafilter for micro adjustments.
They’re typically incompatible — 51mm and 54mm are different diameters and won’t seat the same. Some workarounds exist (replace the group rim or use adaptors) but generally you’d need a portafilter/machine designed for 51mm to use that basket safely.
If you want a second portafilter for dialing in, get another 54mm option (like the Normcore variants) and a different basket (IMS) to compare.
I bought a 51mm spare once and it was a pain — it didn’t lock properly and hotspots appeared. Not worth the headache unless your machine supports it.
One hack: some folks machine custom reducers, but that’s for specialists. Not recommended for casual home baristas.
Short and sweet: the practice/record suggestions were gold. Recording extraction times and weights with the Maestri House Mini USB-C Espresso Scale changed my game.
Nice, practical advice — nothing too preachy. 👍
Love hearing that, Hannah. The scale really removes guesswork — glad it’s working for you!
Yes! The scale helped me stop relying on eye-balling crema. Game changer.
Nice article but felt a bit high-level in places. For example, the SHARDOR 40mm Conical Burr Coffee Grinder is mentioned with no specific grind ranges or settings. Not all grinders behave the same and newbies could be misled.
Would be nice if you listed starting grind numbers for common grinders (e.g., “start at 3–4 clicks from zero on X model”). Also, your ‘tamp pressure’ section glossed over how important base leveling is with cheaper grinders. 🤷♂️
Thanks — we’ll add a community-sourced grind starting point list in the next update.
I actually wrote down my starting points for the SHARDOR: 6/30 for ristretto-ish on my unit, but ymmv. Always adjust by taste.
Agreed — if you put the SHARDOR in the article, a quick example setting would help. I had to experiment for hours before finding a sweet spot.
Good critique, Omar — fair point. We avoided model-specific clicks because many models have different zero points, but I hear you. For follow-up content we can include example starting points for common grinders and a short table of grind ranges.
Regarding cheap grinders: yes, distribution and purge routines are critical; we’ll expand that part.
Good primer. Quick question: the IMS Precision 18–22g Competition Filter Basket sounds great, but is it worth swapping out the stock basket on a Breville? Anyone noticed a big difference in crema or extraction consistency?
Also remember IMS baskets are typically for single/multi-hole patterns — match basket size to your portafilter diameter (54mm vs 51mm differences matter).
Thanks James — short answer: yes for consistency, especially if you’re dosing in that 18–22g range. IMS baskets have straighter walls and more precise holes which can improve evenness and reduce blind spots.
Longer answer: if you’re moving from a cheap pressurized basket, you’ll see more crema and more sensitivity to grind/dose, so expect to dial in more. Totally worth it for people practicing technique.
If you’re on the fence, try a competition basket first on a couple of shots. It makes the flaws more obvious but rewards good technique.
I swapped to IMS last year — extraction improved and shots tasted cleaner. But be prepared to adjust your grind and dose; you’ll need to re-dial your whole recipe.
Nice guide. I’m wondering about the difference between the Normcore 54mm Bottomless Portafilter and the 51mm Bottomless Portafilter with 304 Basket. Is it just size/fit, or does the 304 basket (stainless) make a flavor difference? Curious about material effects.
Main differences: diameter/fit and basket design. 304 stainless is a material spec — most baskets are stainless (304 is common) and shouldn’t alone change flavor. The basket hole pattern, depth and wall profile influence flow and extraction more than the stainless grade.
So pick by what fits your machine (54mm vs 51mm) and preference for basket design (IMS vs generic 304).
304 vs other grades is mostly corrosion resistance and durability — not taste. Focus on holes and wall geometry for performance.
Tamping section was my fave — loved the pressure/angle breakdown.
I’ll rant a little: when I switched to the Normcore V4 Spring-Loaded 53.3mm Coffee Tamper, my wrists thanked me. No more inconsistent 20-30 lbs nonsense.
But can we talk about angle? I still find myself slightly off-center sometimes. Any drills to build a dead-center tamp habit?
Also try a 2-step: light tap to settle, then firm tamp. Helps me re-center the puck before the full tamp.
Great question — practice the tamp stance: feet shoulder-width, elbow tucked, wrist straight. Try these drills:
– Blind tamp: close eyes and tamp straight down 20 times.
– Use a flat mirror under the puck to watch contact.
– Mark the tamper base with a small sticker to align with the spout.
The spring-loaded tamper helps a lot for pressure consistency, just pair it with focus on alignment.
Really enjoyed the Practice, Record, Improve section — it made me actually start a little spreadsheet of shots instead of trusting memory.
I combined a Maestri House Mini USB-C Espresso Scale with notes about IMS Precision 18–22g Competition Filter Basket and my Normcore bottomless. After a week the numbers told me to slightly coarsen the grind and reduce tamp pressure. Funny how data turns you from a ‘wing-it’ into a scientist overnight.
Also, pro tip: take a 10-second slow-mo clip of the flow on your phone. You’ll notice subtleties you miss in real time (and it’s oddly satisfying to watch).
Slow-mo is gold. Also, keep a note of water temp and purge time — those little variables creep in.
Yes to the spreadsheet. I color-code mine by flavor notes and pull times. Nerdy but effective.
Love that — turning coffee into a tiny lab yields reliable improvements. Slow-mo flow clips are one of the easiest, highest-ROI diagnostics you can do.
Loved the tamp tips — quick q: when you say “level and angle,” how much tilt is too much? My tamp *might* be slightly angled (like 2–3 degrees?) when I’m in a hurry 😬. Also, do any of you use the Normcore 54mm Walnut Handle Bottomless Portafilter and feel any difference in hand comfort? ty! 😊
2–3 degrees used to be my norm too 😂 switched to the spring tamper and it forced me to be more centered.
No shame in being angled occasionally; awareness + tiny habit drills fix it fast.
2–3 degrees is small and often okay, but aim for 0 degrees. Small tilts can compound and cause side channeling. Quick check: look at the puck edge after tamp — if one side is higher, try to correct that with distribution or light knockdowns before the final tamp.
Walnut handle is just nicer to hold; no extraction magic but it feels nicer when you’re doing lots of shots.
I used to tamp at a tilt until I started a mirror drill — basically place a mirror on the counter and tamp while watching — you’ll see your angle instantly.
This article made me buy the SHARDOR 40mm Conical Burr Coffee Grinder at 2am. No regrets. My apartment now smells like a coffee shop and my partner is both delighted and alarmed. 😂
Seriously though, the grind control tips were great. Anyone else find the SHARDOR over-extracts unless you go coarser than expected?
If you want less work but similar results, try the Maestri House Mini USB-C Espresso Scale for consistent dosing — fewer variables to blame 😅
My partner left too after I bought a bottomless portafilter. We trade the smell for better shots 🤷♂️
Yep — my SHARDOR was jumpy at first. I found dialing the grind 2–3 notches coarser than what I expected did the trick. Also, purge a few shots between adjustments.
Pro tip: SHARDOR is decent for espresso if you can live with some cleanup and retuning; for pro-level consistency, step up to a 50mm+ burr.
Haha, late-night purchases are a mood. SHARDOR grinders can be clacky on the lower-cost end; they’re fine for home use but dial in carefully. If you’re over-extracting, try coarser and check dose — sometimes small changes fix it.
Also consider the burr size and consistency; a higher-end grinder will give tighter particle distribution which can change your recipe.
Loved the ‘Read the Flow’ section but wished there were more photos or slow-mo gifs showing what a good vs bad flow looks like. The text descriptions are helpful but visuals would make it 100% foolproof.
Also, the Normcore 54mm Walnut Handle Bottomless Portafilter looks gorgeous — anyone here using the walnut handle aesthetic AND getting actual performance benefits?
Great point, Zoe. We’ll add a flow gallery in the next update (slow-mo included). For walnut handle — mostly cosmetic, but a heavier handle can sometimes affect balance when removing the portafilter after a shot. Performance-wise, it’s about the basket and spout/style, not the handle wood.
I have the walnut handle and yes it looks sick. Performance is identical to the standard Normcore — I bought it for the countertop vibes 😂